Destination App
#A destination app defines where Plakar Control Plane can restore backup data.
Assigning a destination app
#Destination apps are assigned from the Resources page. Click on a resource to open it, then go to the Apps tab. This tab shows all source and destination apps already assigned to the resource and allows you to assign new ones. Store apps are not managed from here, see the store app documentation for how to assign a store.
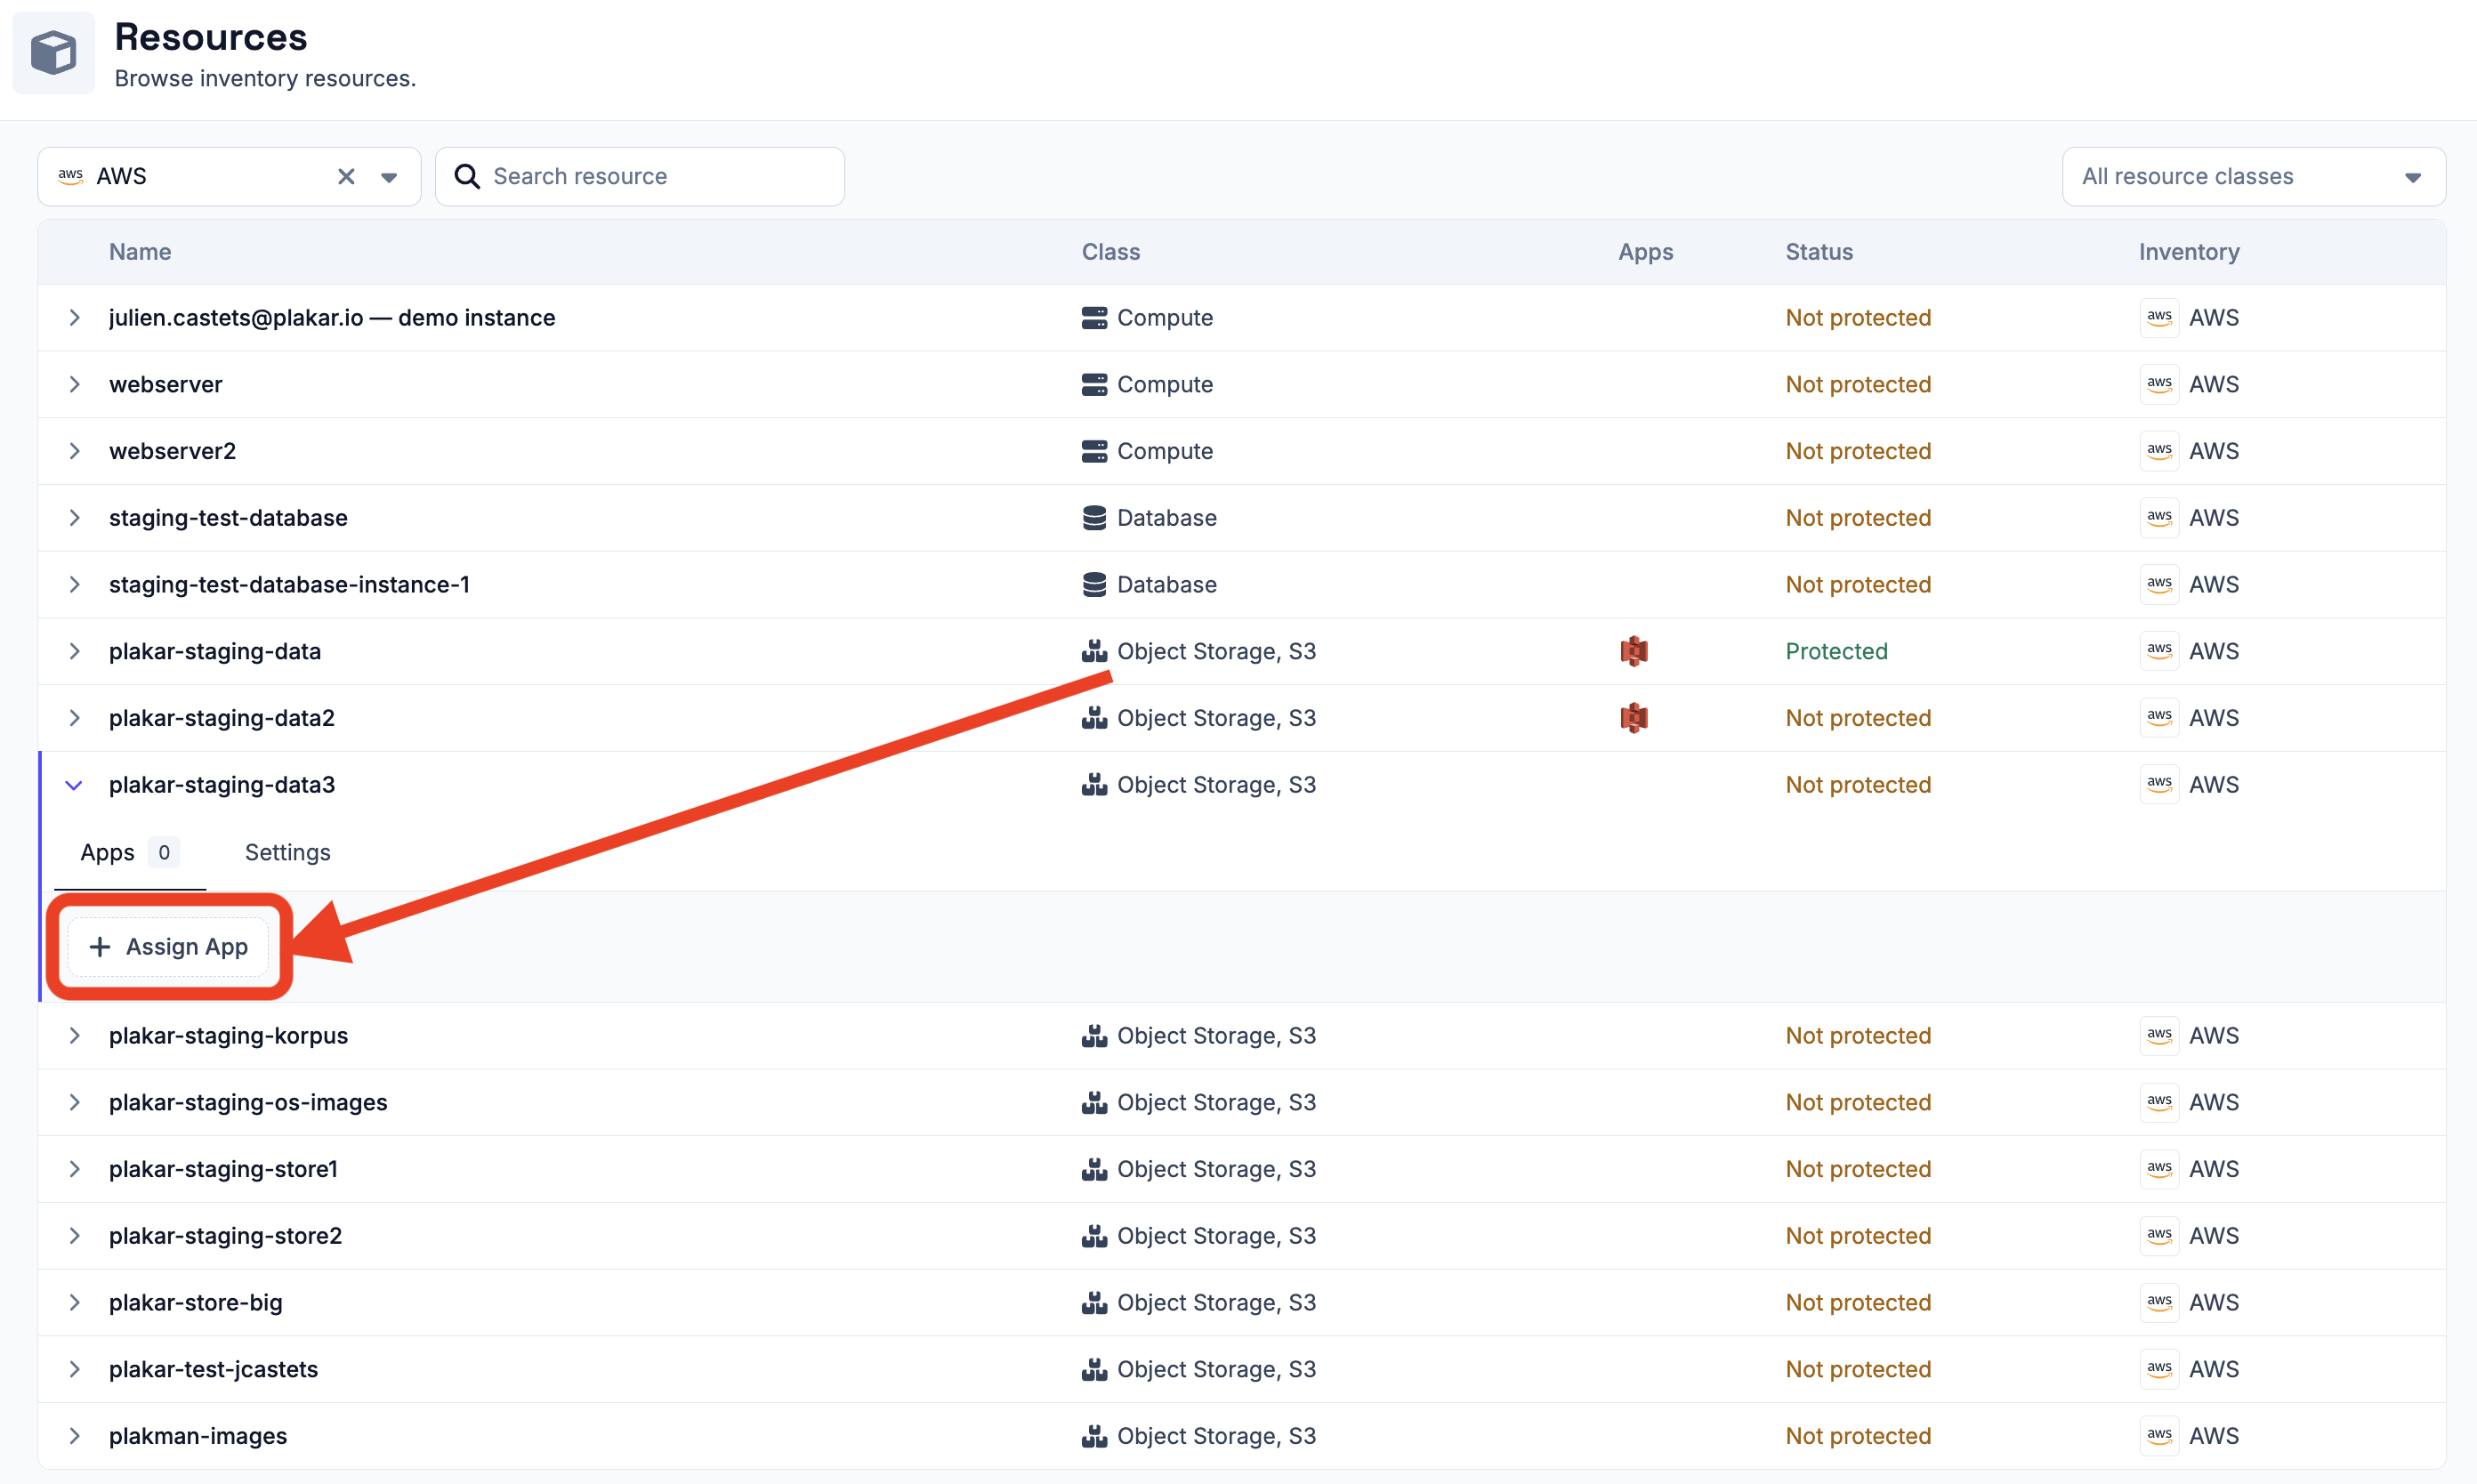
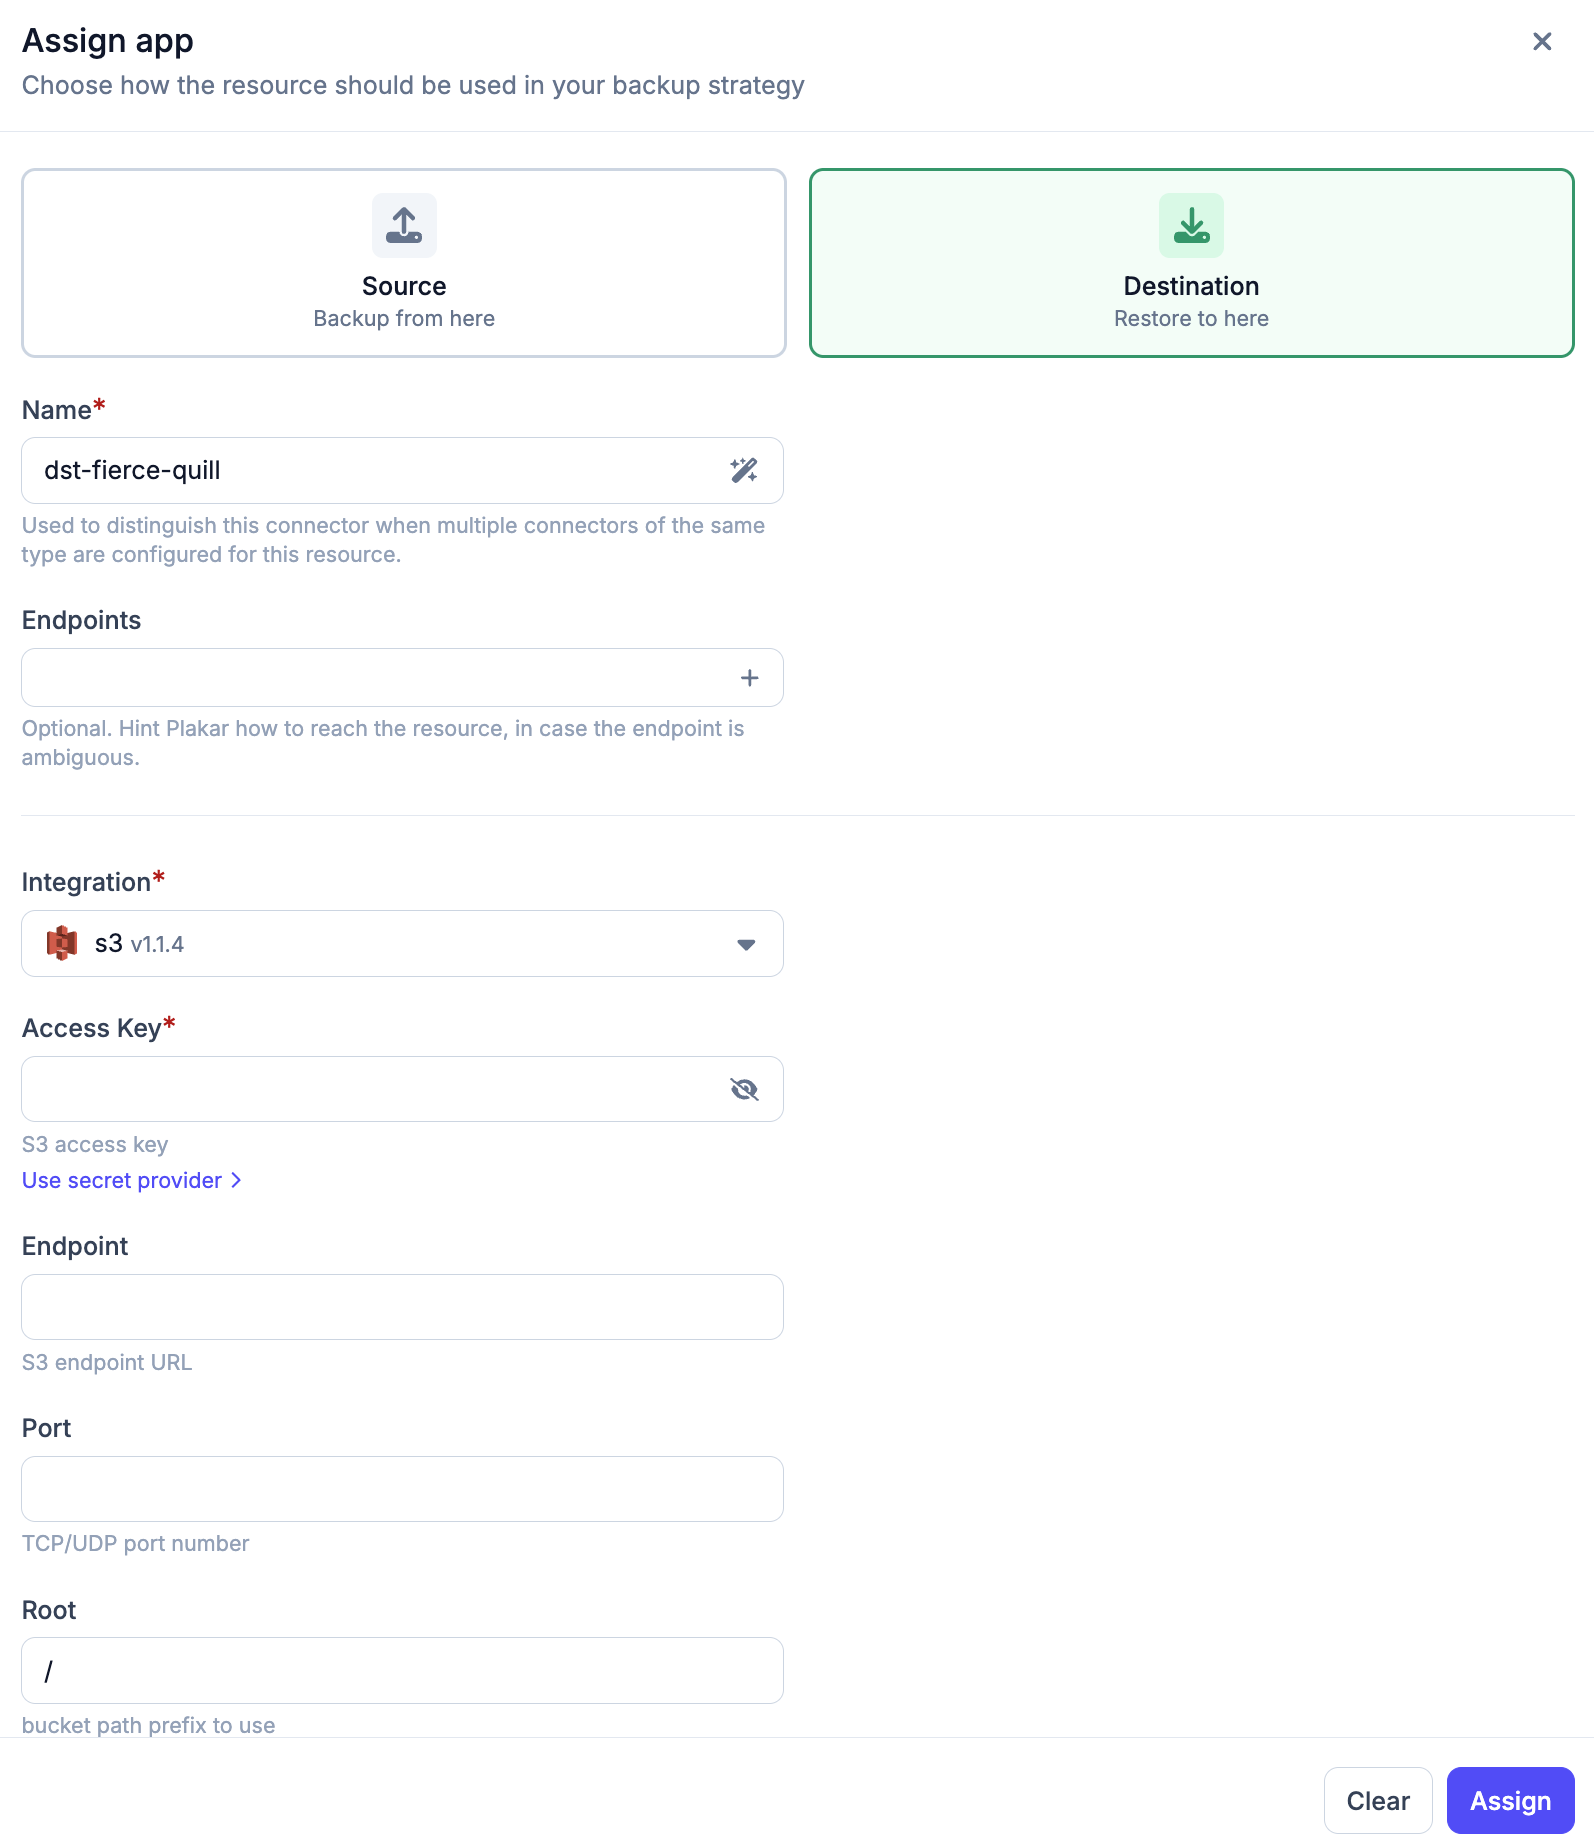
To assign a destination app, click Assign app from the Apps tab and select Destination. Then provide a name for the app. The name is used to distinguish this app when multiple apps of the same type are configured for the same resource.
Plakar Control Plane checks the resource class and subclass to find
compatible integrations. If only one integration is compatible, it is selected
automatically, which is the most common case. If multiple integrations are
compatible, you will need to select one manually.
Finally, provide the configuration and credentials required for the selected resource. See the resources documentation for the required fields.
Testing the connection
#Once a destination app is created, its details page provides a Dashboard tab with a Test Connection action. Use this to verify that Plakar Control Plane can connect to the destination using the provided configuration and credentials.
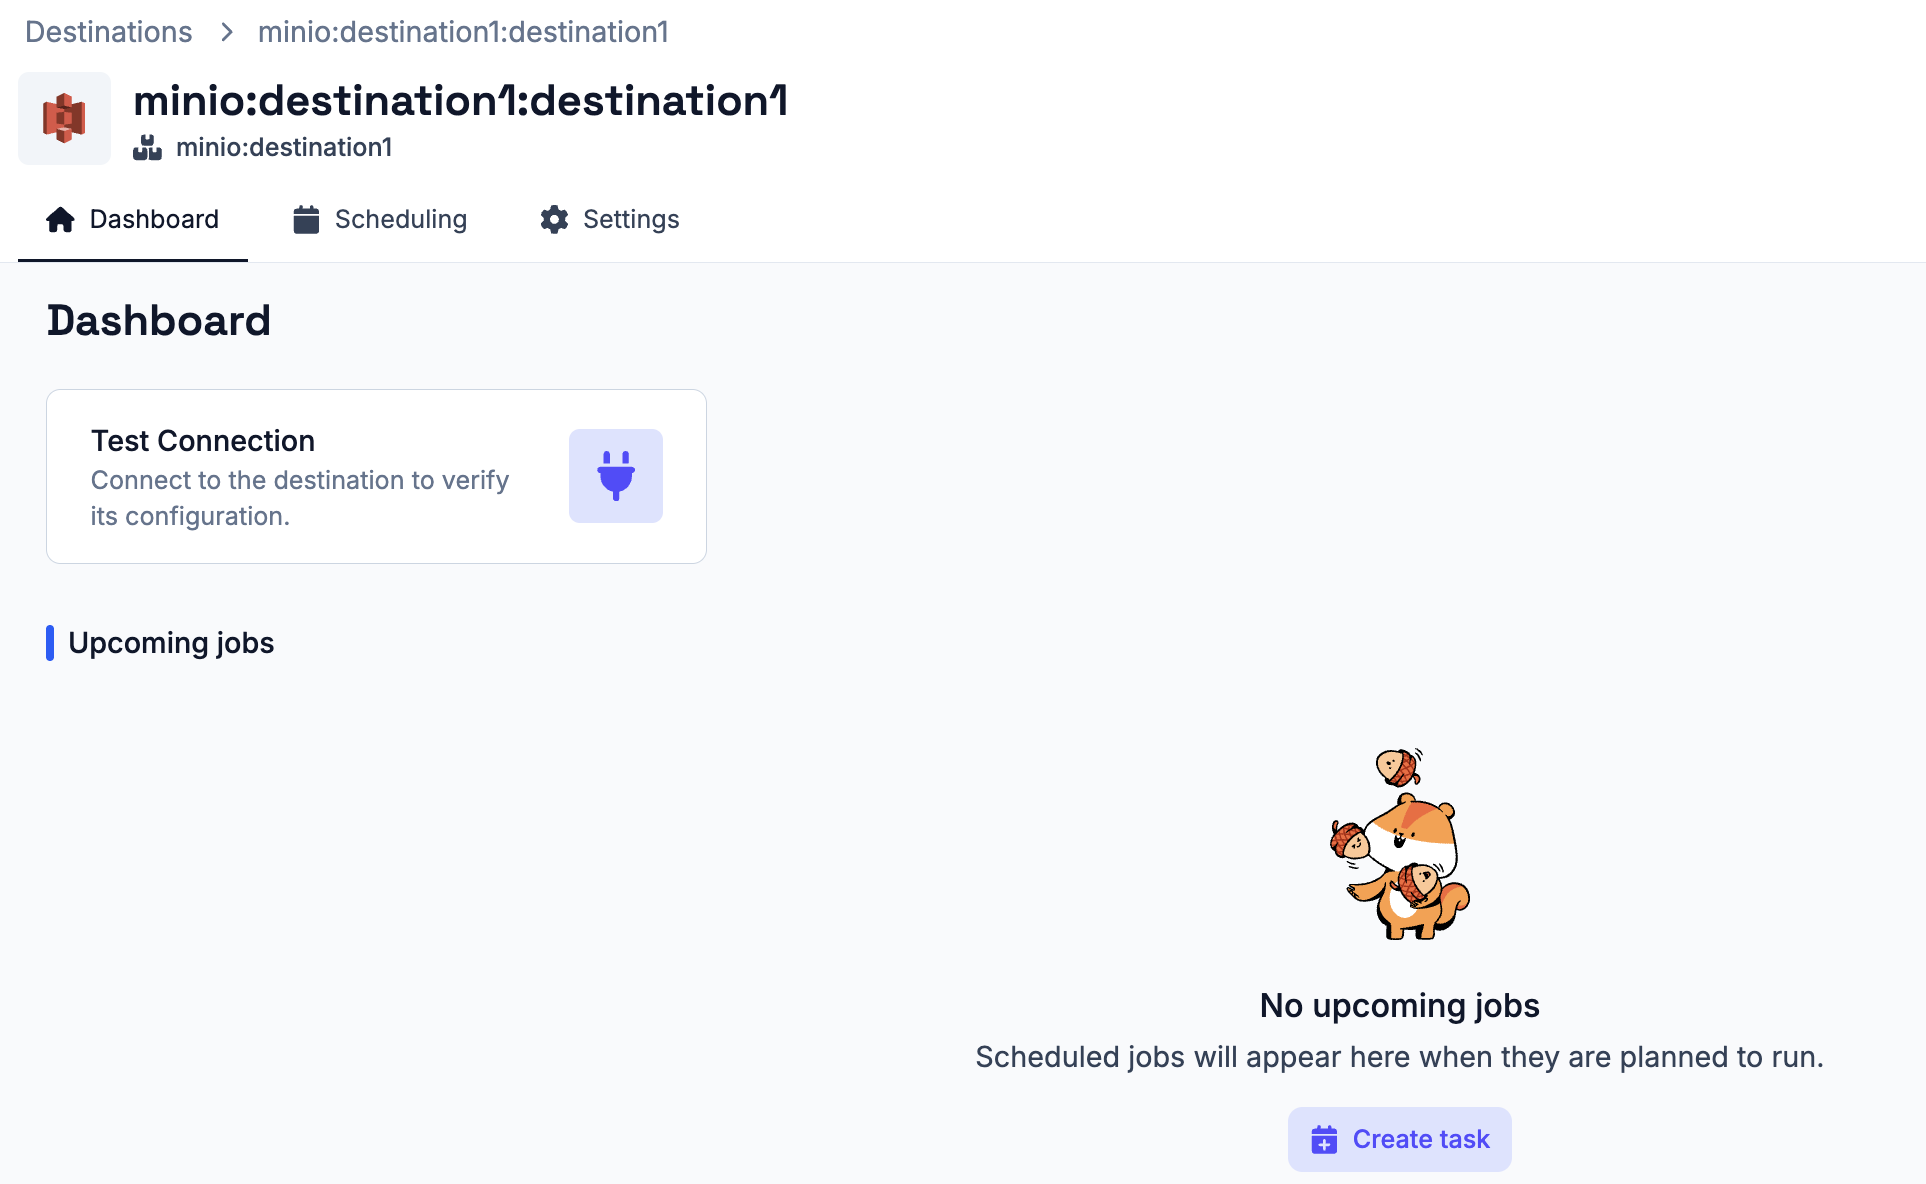
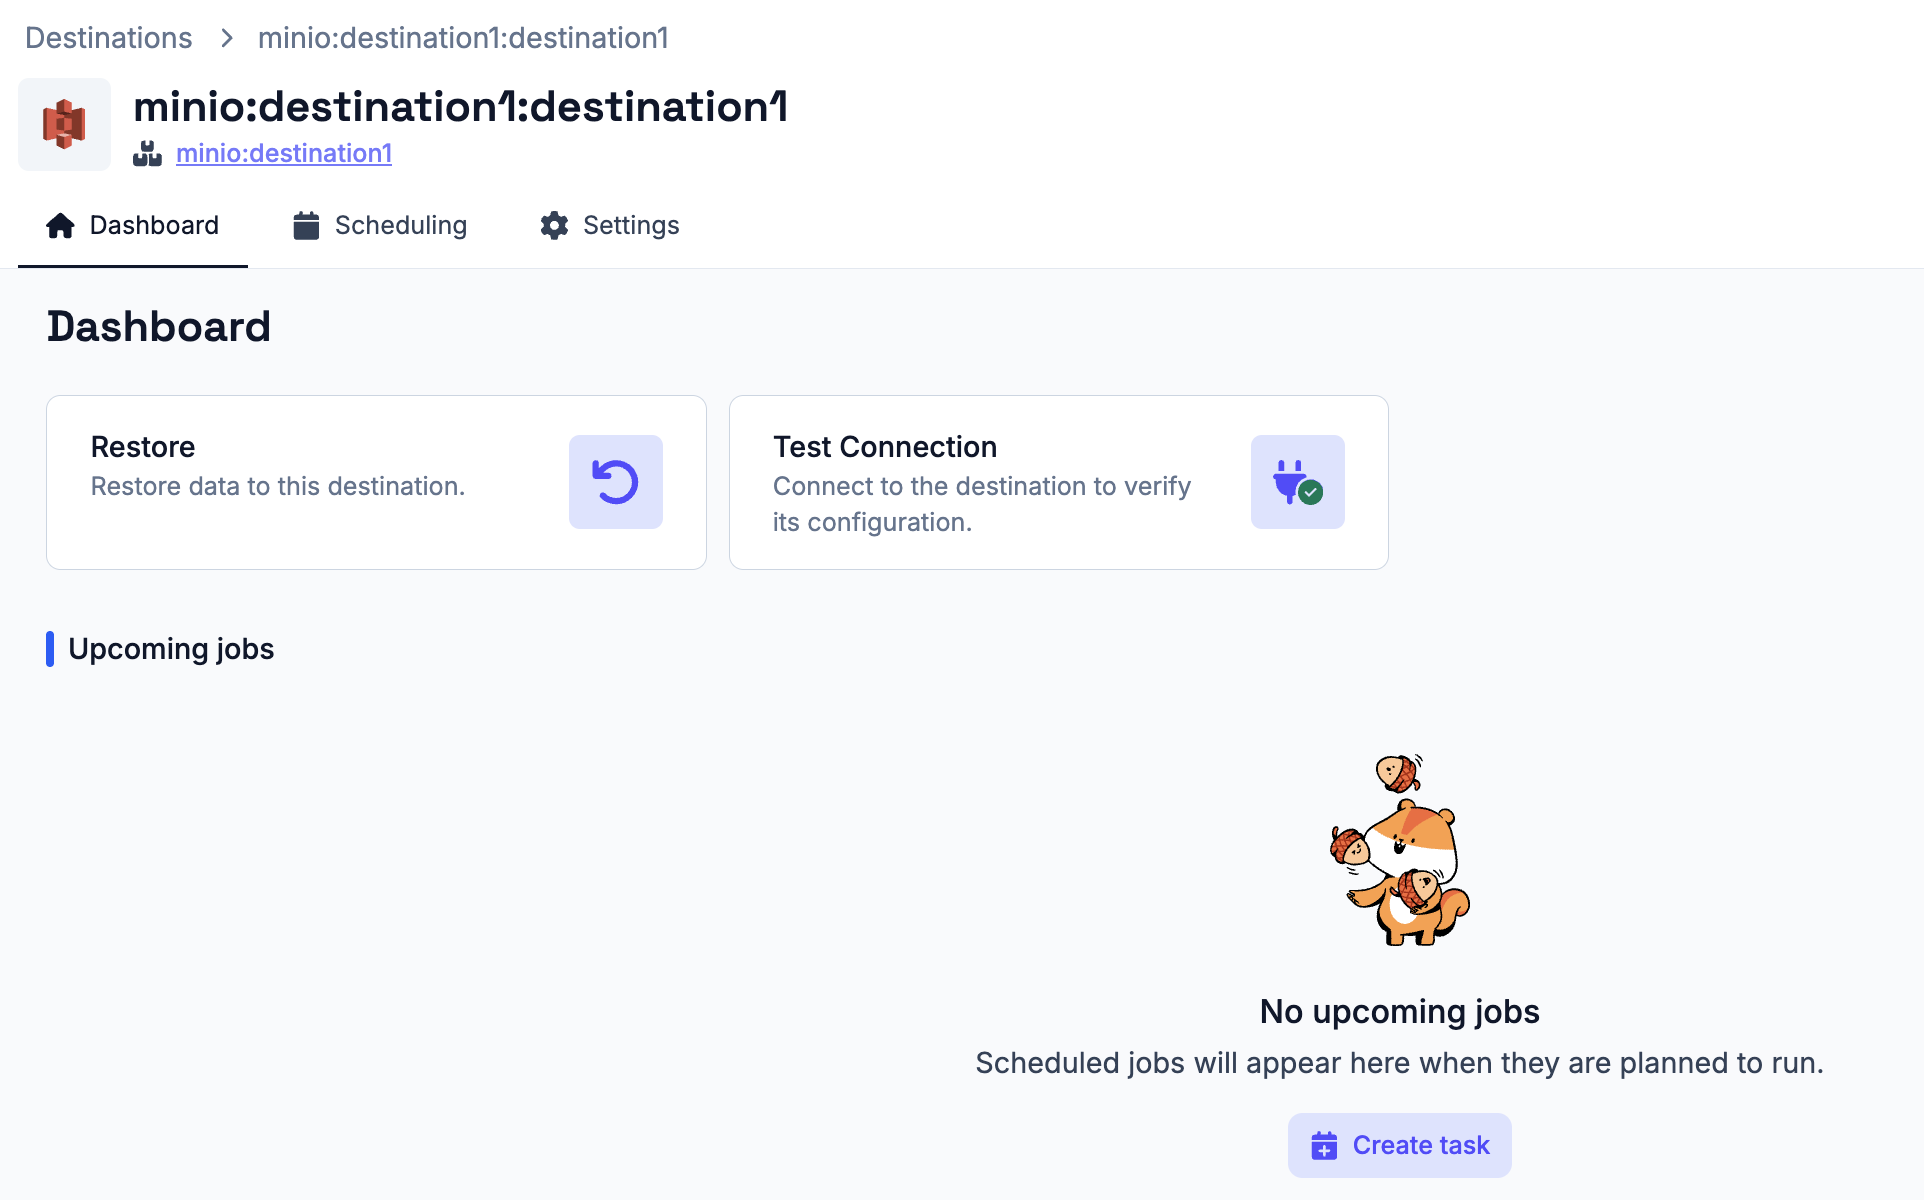
If the connection test fails, check the app configuration and credentials, then run the test again. Once the store has been initialized, additional actions become available from the dashboard:
- Restore Backup - restore a backup to this destination
Tasks and Schedules
#Tasks can be created directly from the destination app dashboard or from the Operations > Scheduling section. See the scheduling documentation for details on creating and managing tasks and schedules.