Using Exoscale Compute as a Dedicated Backup Server
#This guide configures an Exoscale Compute instance to automatically back up your servers to Exoscale Object Storage (SOS). The setup uses Plakar to create encrypted, deduplicated snapshots on a scheduled interval with web UI monitoring.
Architecture
#- Backup Compute: Runs Plakar and schedules backups
- Source servers: Exoscale servers to back up
- Exoscale Object Storage (SOS): Stores encrypted backups
flowchart TB
subgraph Sources["Source Servers"]
  Server1["Web Server 1"]
  Server2["Web Server 2"]
  ServerN["Server N"]
end

BackupCompute["Backup Compute
Plakar + Scheduler"]

subgraph Storage["Exoscale Object Storage"]
  Kloset["Kloset Store
Encrypted & Deduplicated
Backup"]
end

Server1 -->|SSH/SFTP| BackupCompute
Server2 -->|SSH/SFTP| BackupCompute
ServerN -->|SSH/SFTP| BackupCompute
BackupCompute -->|Store Snapshots| Kloset
Prerequisites
#- Exoscale account with billing configured
- SSH keypair for instance access
- SSH access to source servers
- Basic familiarity with Plakar commands
Create Object Storage Bucket
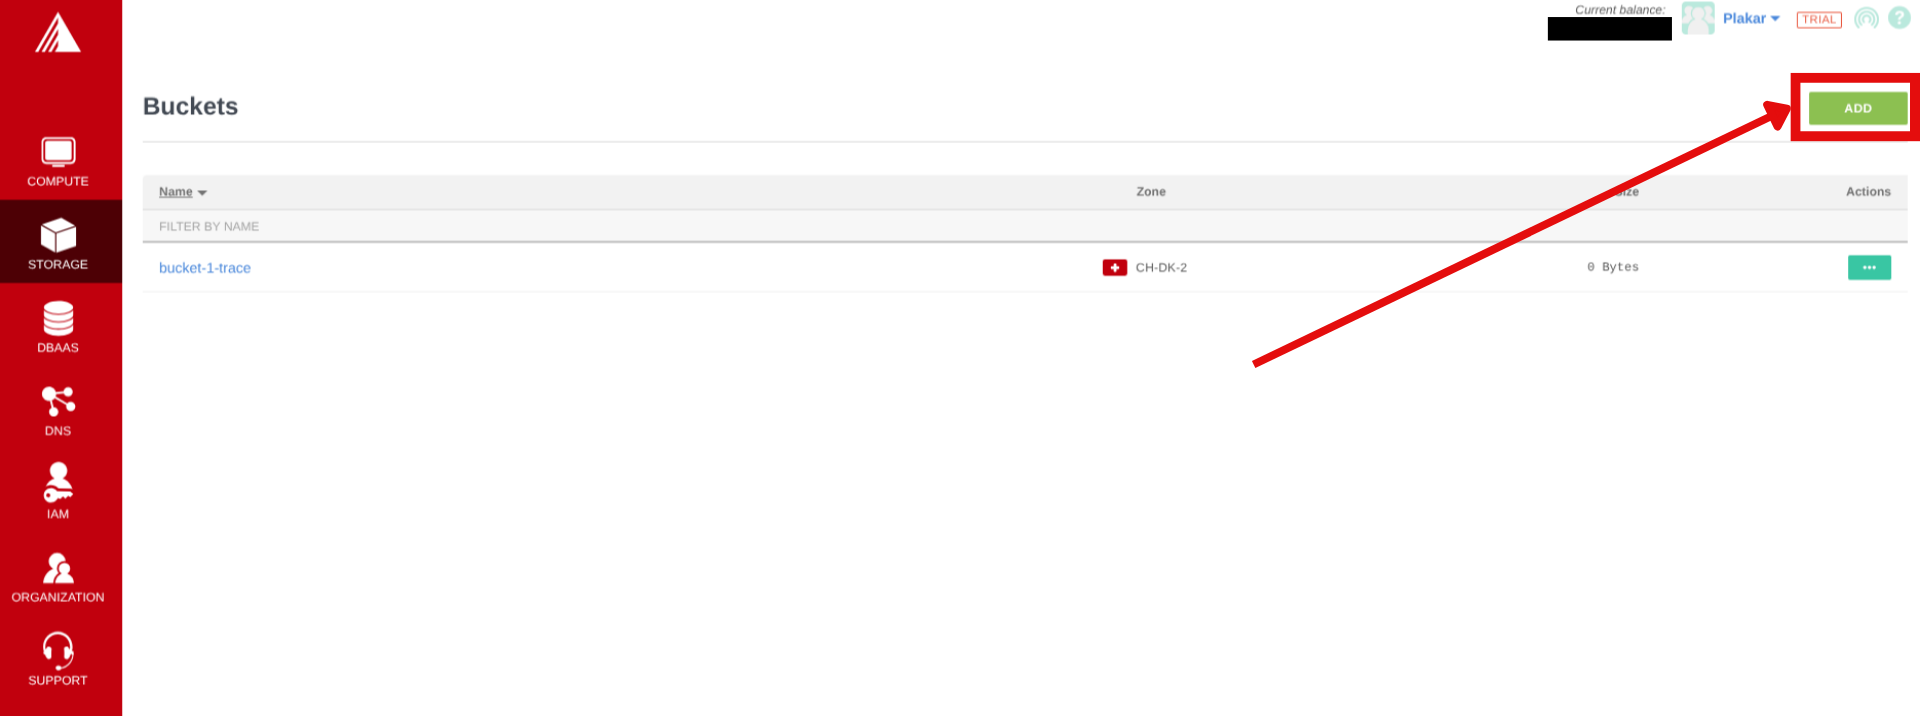
#Create bucket in Exoscale Portal
#- In the Exoscale portal, navigate to Storage
- Click Add to create a new bucket
- Configure:
- Zone: Select region (note the name, it’ll be used to connect to the container e.g
ch-dk-2) - Name:
plakar-backups(must be globally unique)
- Zone: Select region (note the name, it’ll be used to connect to the container e.g
- Click Add
Generate IAM API Keys
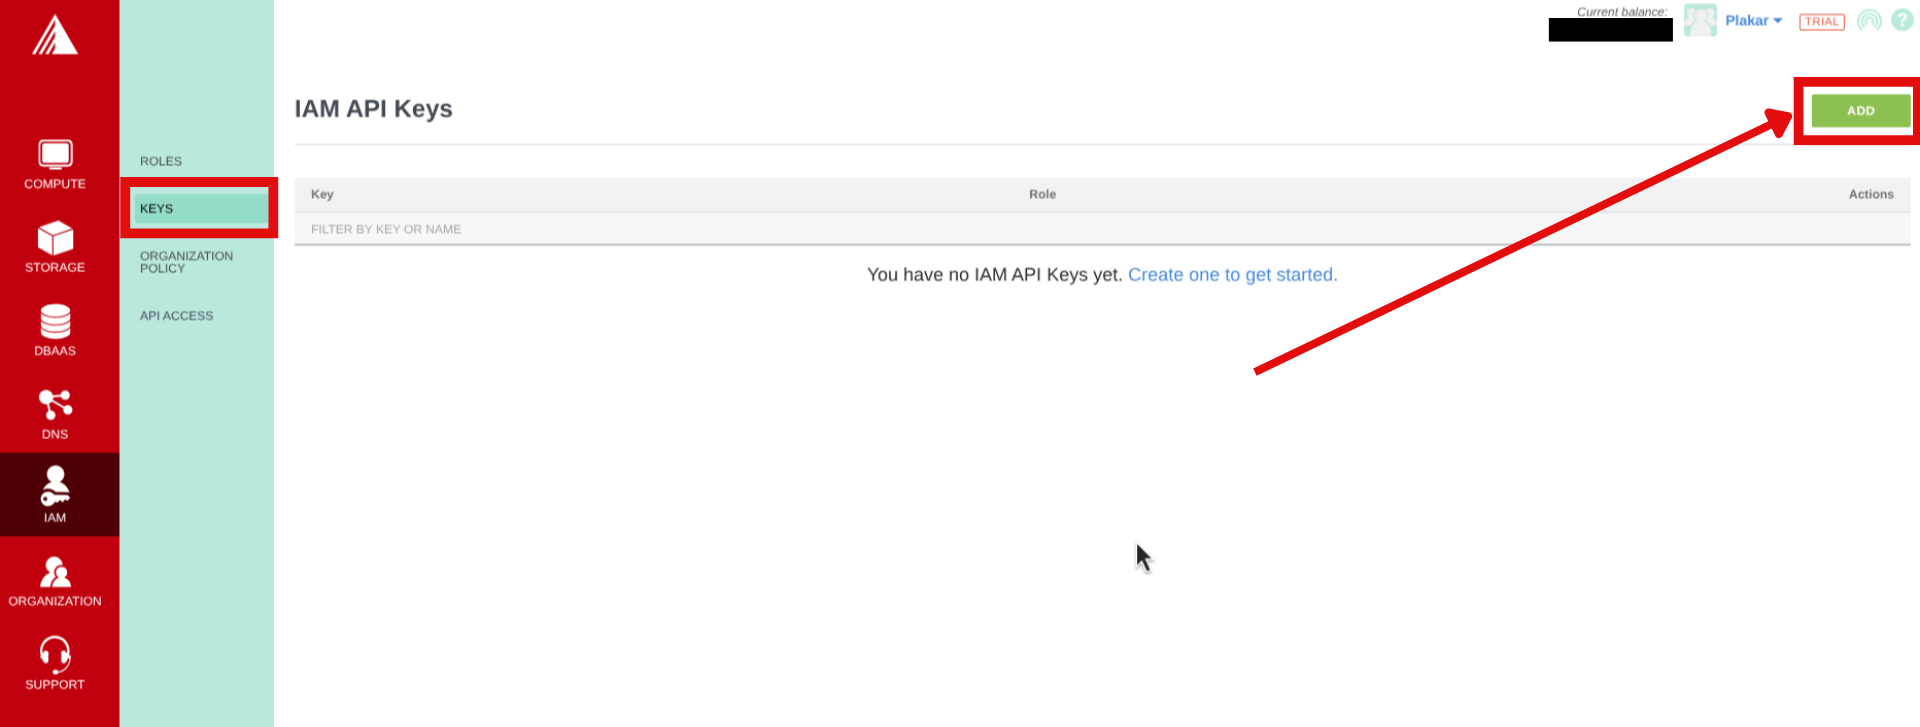
#- In the Exoscale portal, navigate to IAM → Keys
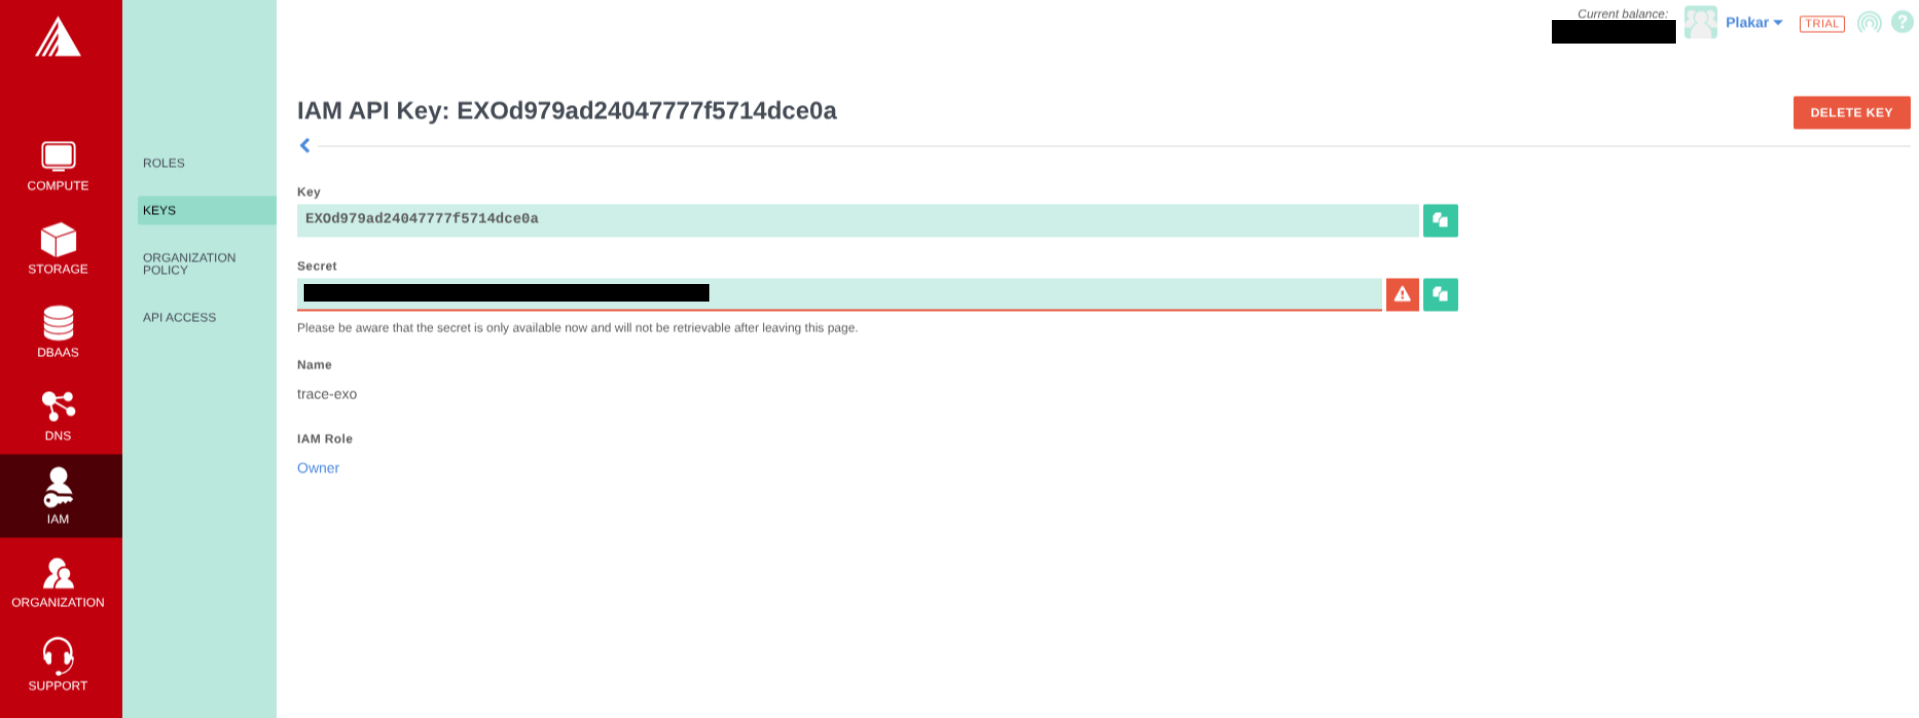
- Click on Add to create new API keys, then provide a name and role, then click Create.
- Copy the key and secret to a secure environment (you cannot see the secret once you leave the page)
Create SSH Keypair
#- Generate SSH key locally and copy the public key:
$ ssh-keygen -t ed25519 -f ~/.ssh/id_exoscale -C "exoscale-backup"
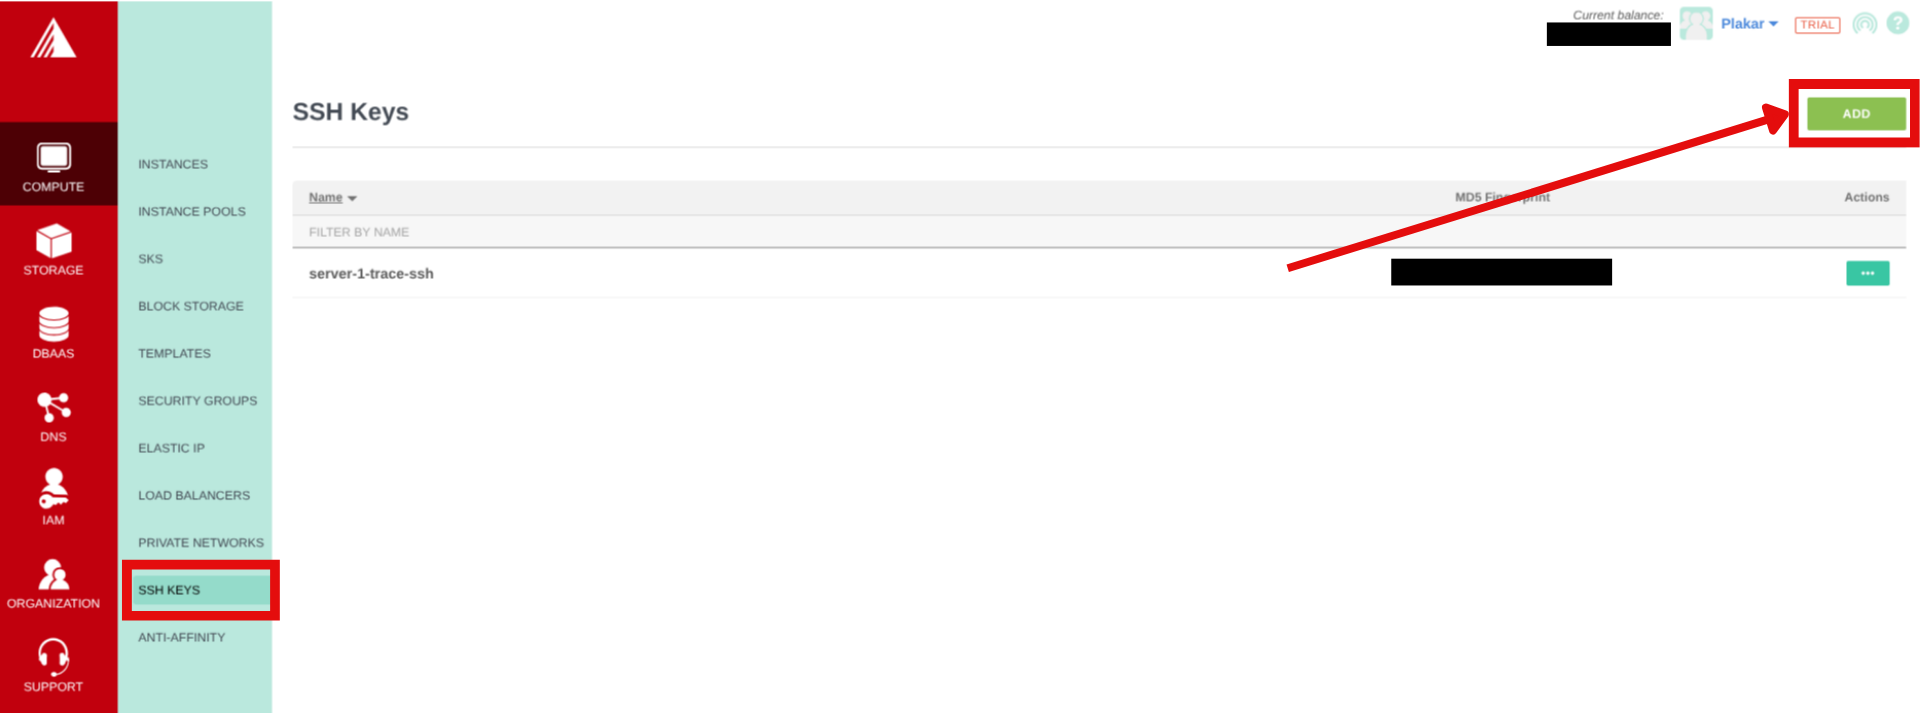
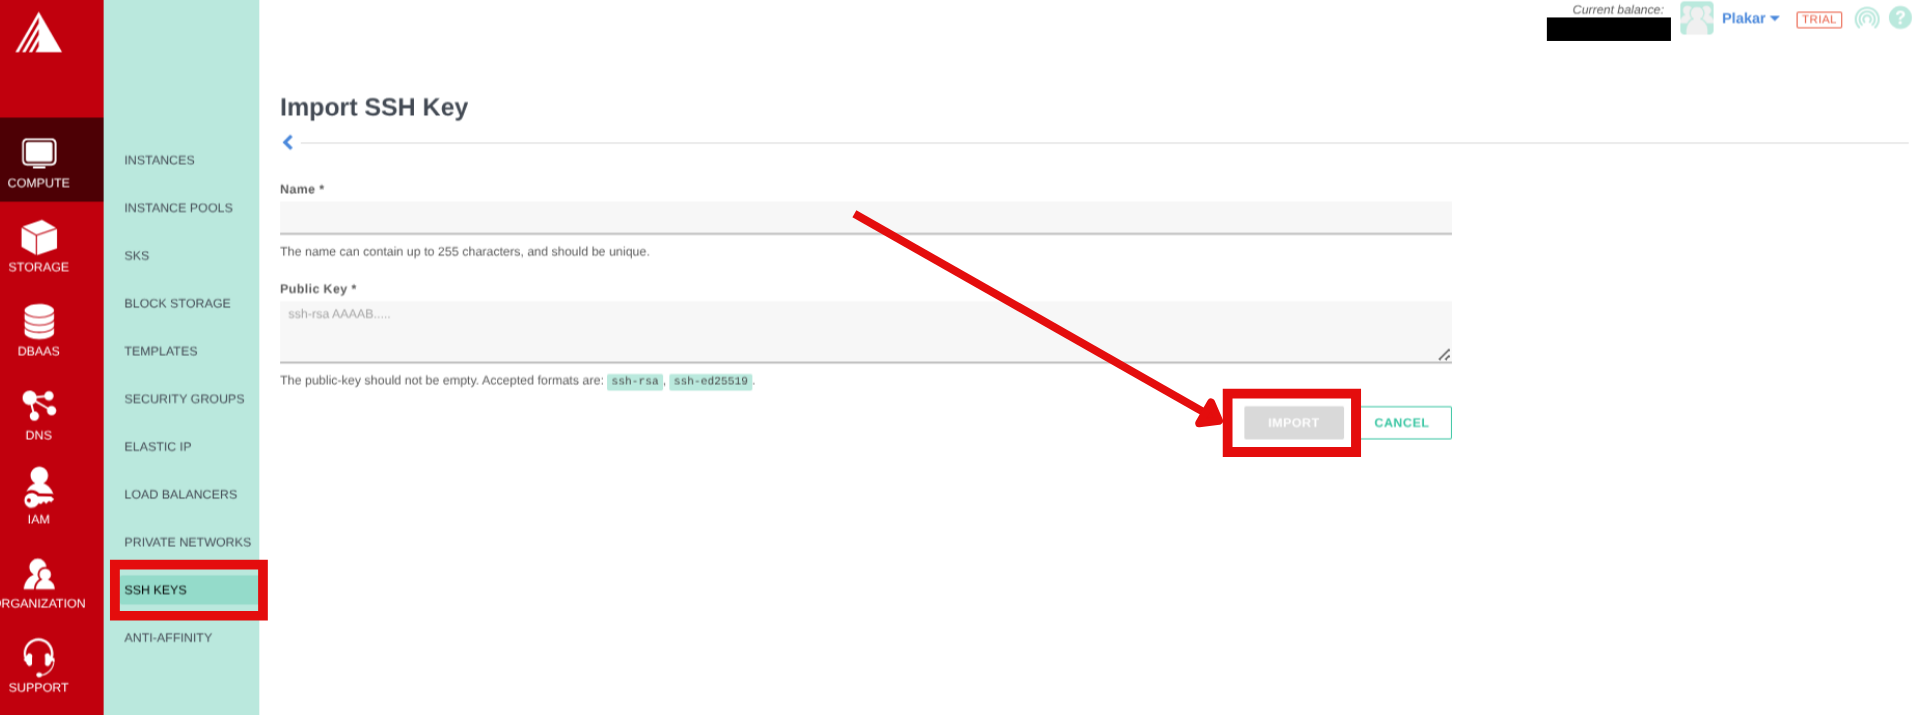
$ cat ~/.ssh/id_exoscale.pub- In the Exoscale portal, navigate to Compute → SSH Keys
- Click on Add then enter a name for the SSH Key and paste in the public key then click Import.
Provision Backup Compute Instance
#Create compute instance
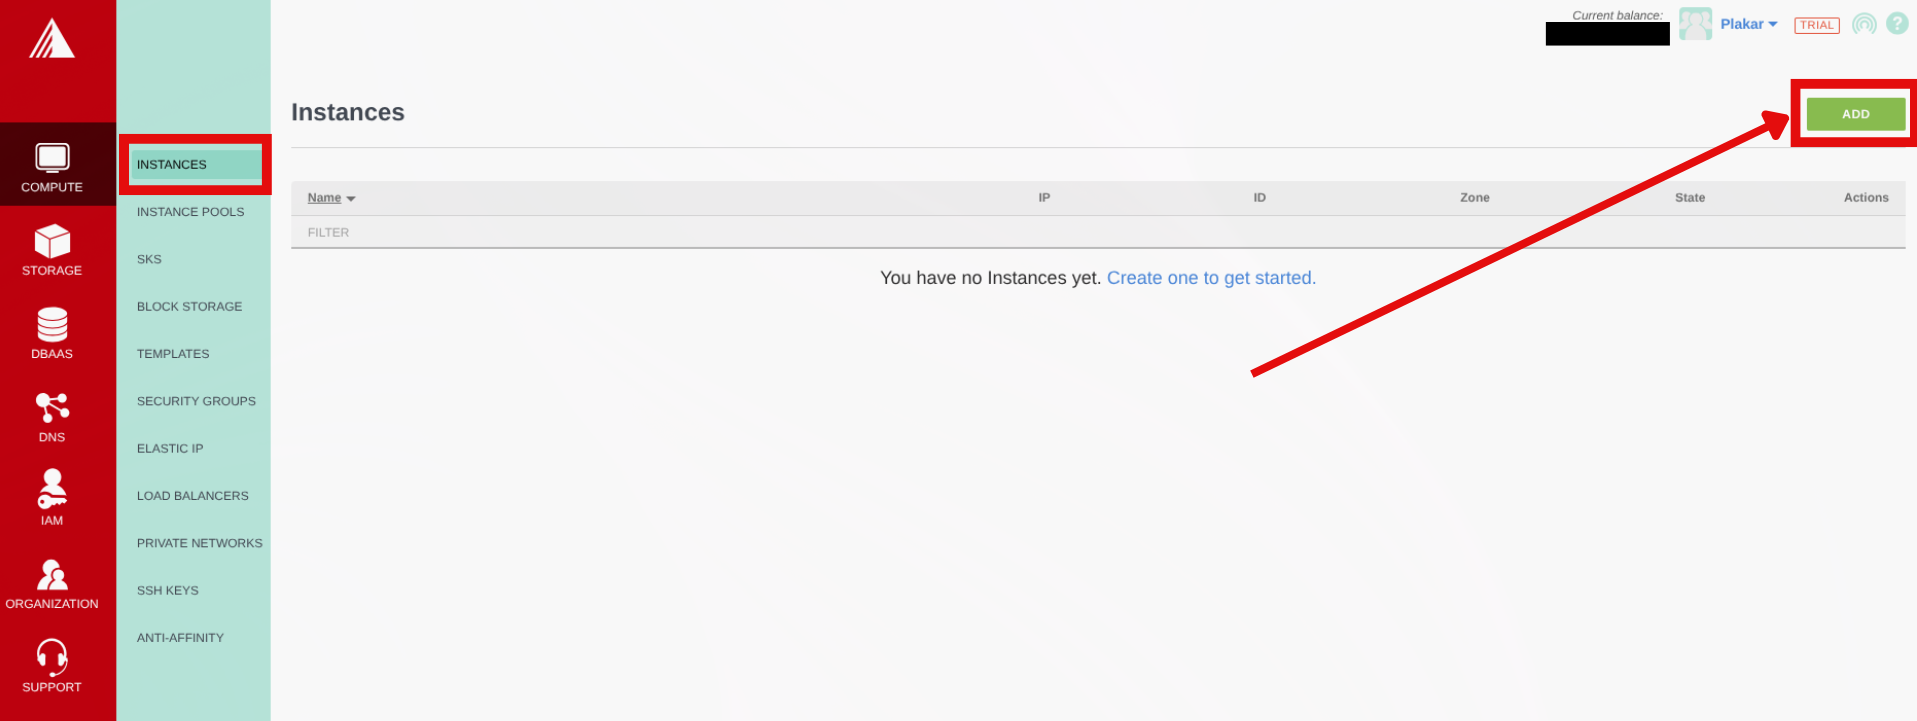
#- In the Exoscale Portal, navigate to Compute → Instances
- Click Add
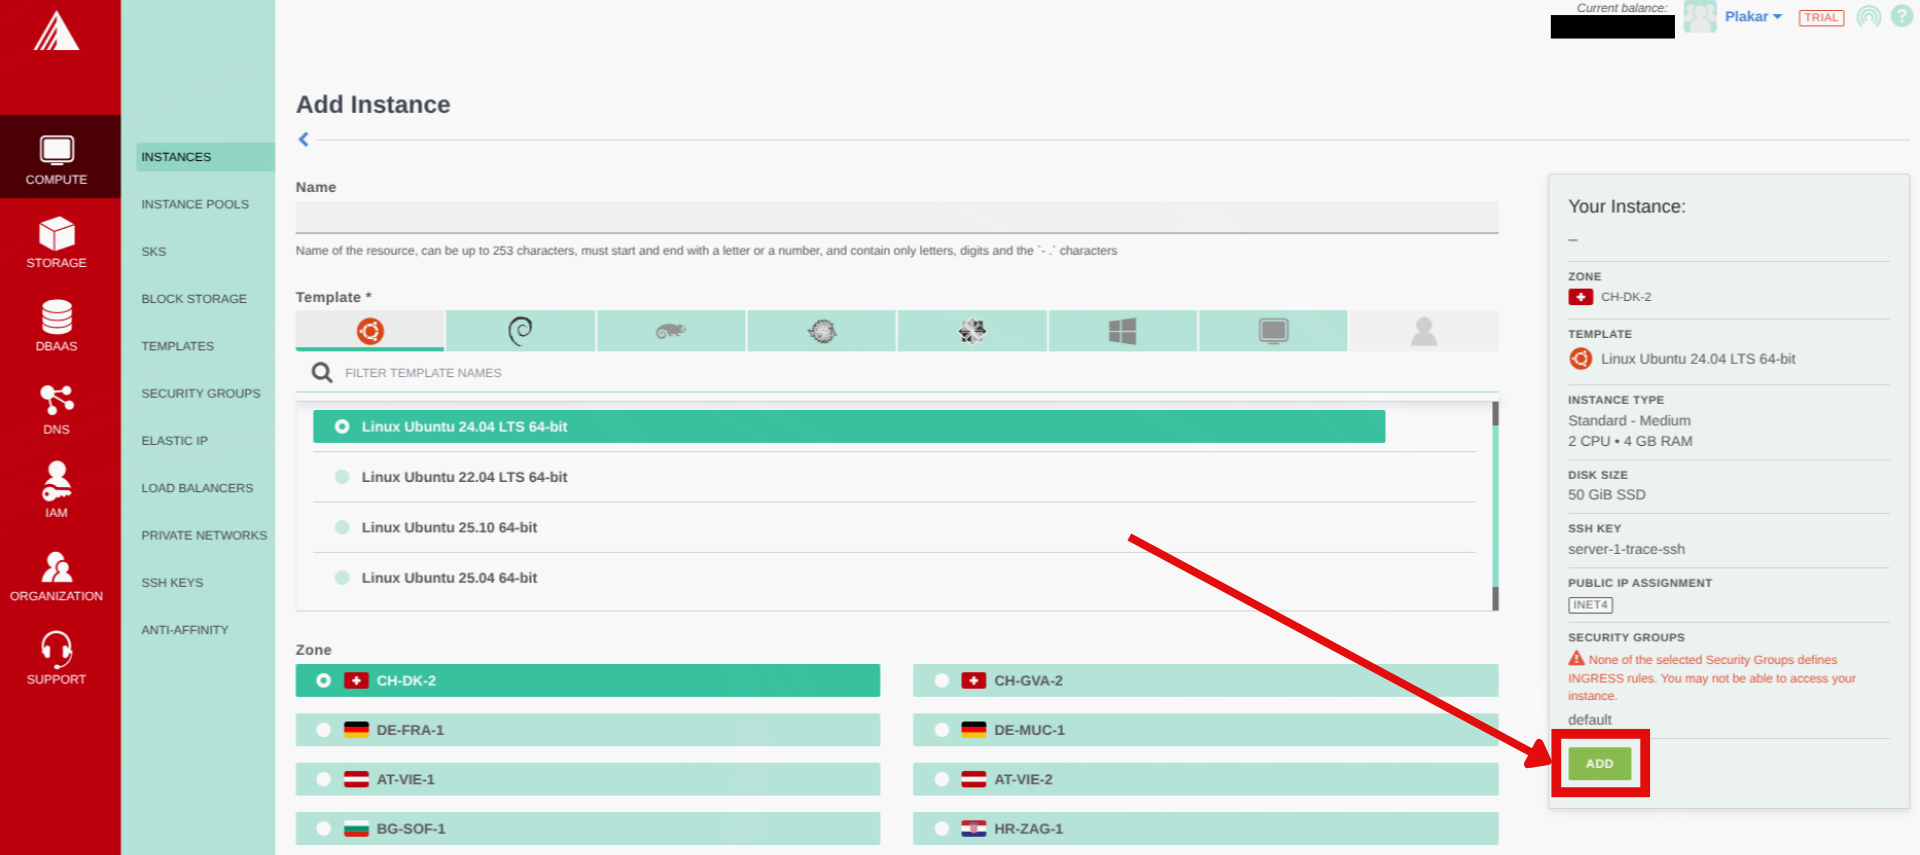
- Configure:
- Name:
plakar-backup - Template: Ubuntu 24.04 LTS
- Zone: Same as Object Storage bucket (recommended for better performance)
- Instance Type: Small (2 vCPUs, 2 GB RAM) or any other you prefer
- SSH Key: Select the SSH key we created before from the dropdown
- Name:
- Click Add to provision your compute
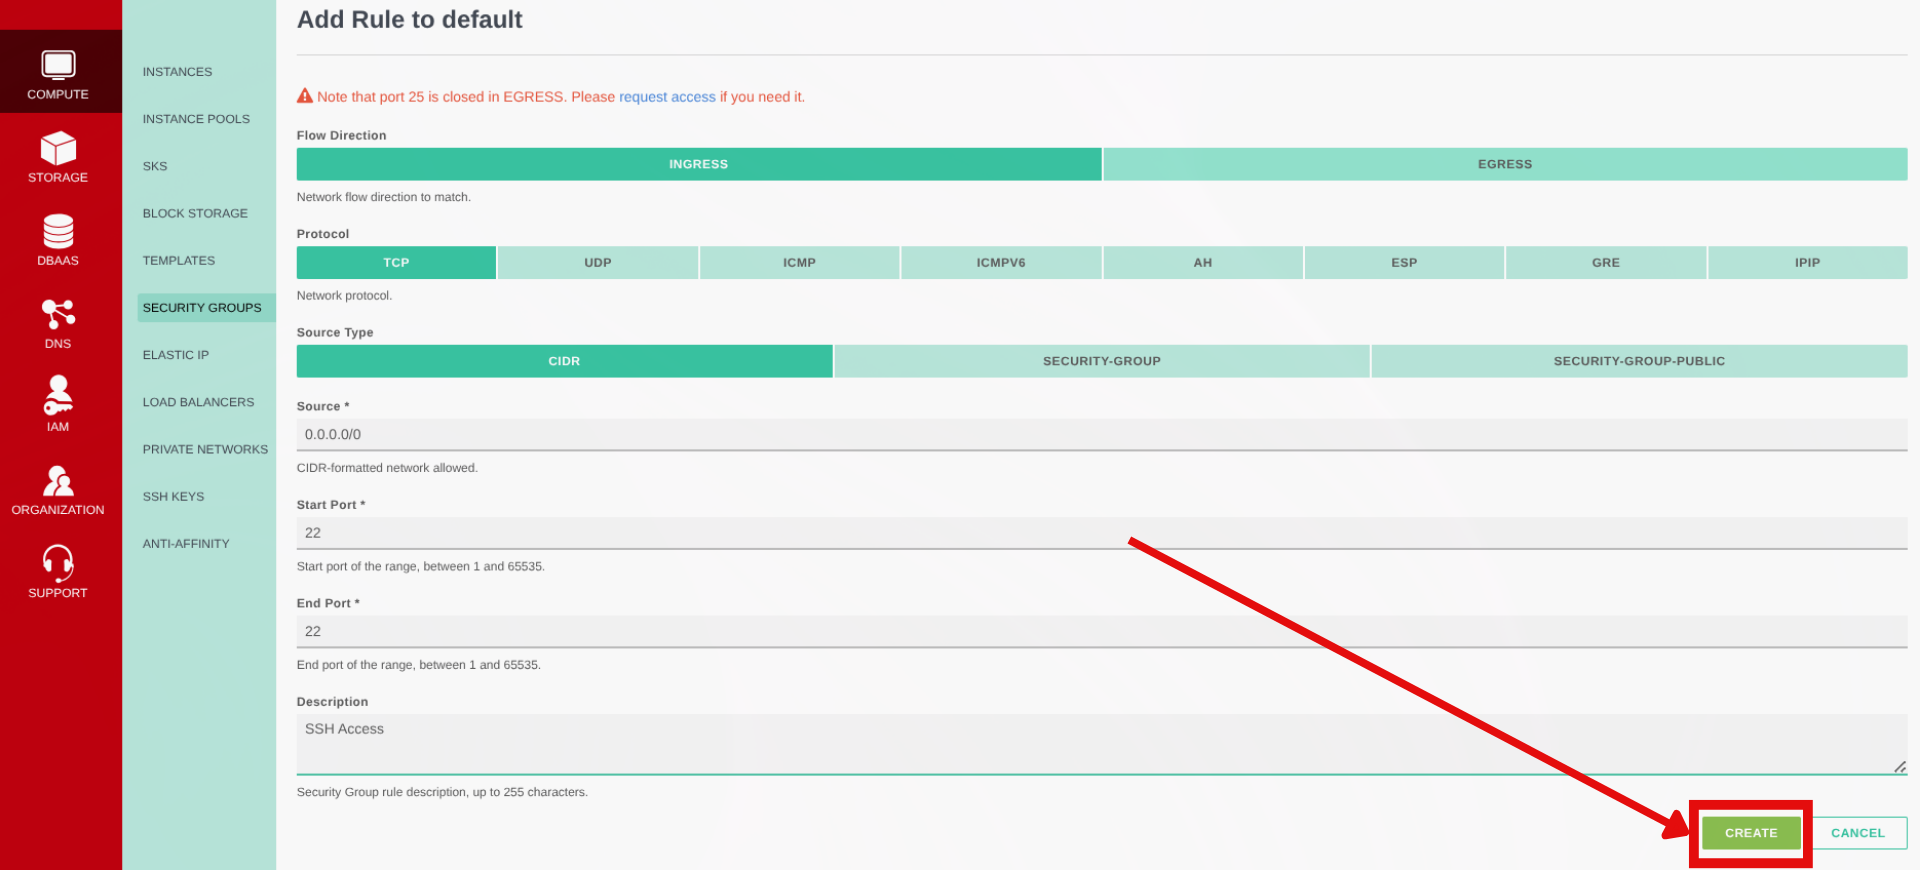
Setup security group rules
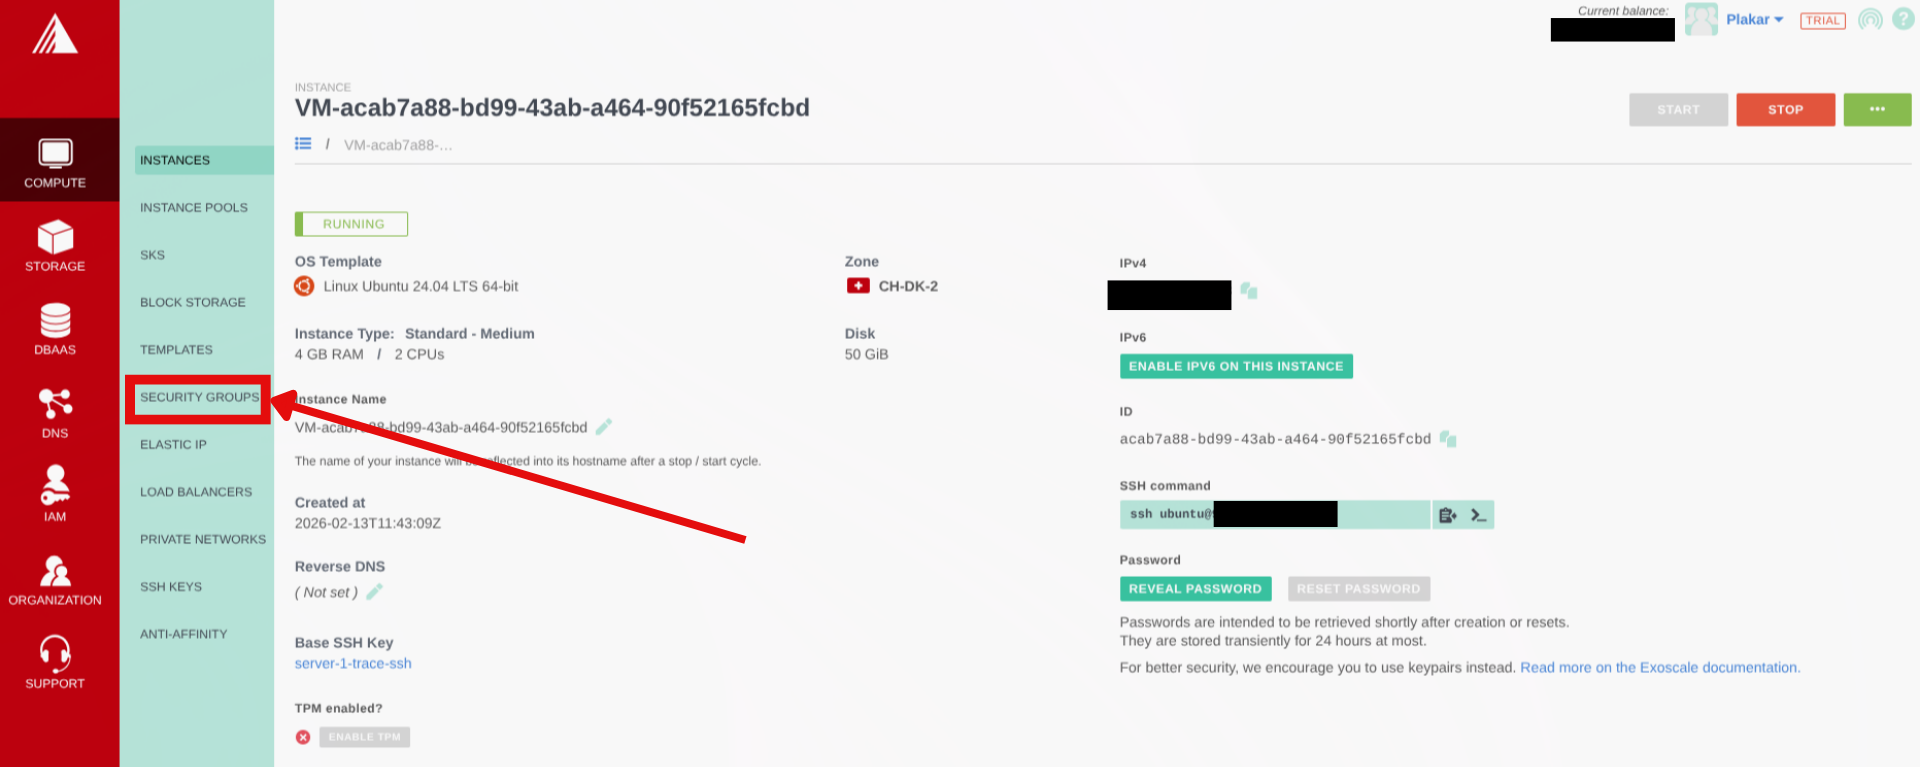
#- Once the compute is provisioned, navigate to Compute → Security Groups
- By default the compute will be assigned the
defaultsecurity group, click on the actions on default then click on Details - On the next page click on Add Rule
- Configure:
- Flow direction: Ingress
- Protocol: TCP
- Source Type: CIDR
- Sources:
0.0.0.0/0allows SSH from anywhere (for better security use your IP Address here) - Start & End port: 22
- A description for the rule e.g. SSH Access
- Click on Create
Initial connection
#Once instance is running, note the public IP and connect:
$ ssh ubuntu@<instance-ip>Install Plakar
#Install Plakar on the instance using the Plakar Installation Guide
Configure Object Storage
#Install S3 integration
#$ plakar login -email you@example.com
$ plakar pkg add s3Add storage connector
#$ plakar store add exoscale-sos-backups \
location=s3://<SOS_ENDPOINT>/<BUCKET_NAME> \
access_key=<YOUR_ACCESS_KEY> \
secret_access_key=<YOUR_SECRET_KEY> \
use_tls=true \
passphrase='<YOUR_SECURE_PASSPHRASE>'Replace:
<SOS_ENDPOINT>: using the formatsos-{zone}.exo.iowhere zone is one we selected for the bucket e.gsos-ch-dk-2.exo.io<BUCKET_NAME>: e.g.,plakar-backups<YOUR_ACCESS_KEY>and<YOUR_SECRET_KEY>: From bucket API credentials<YOUR_SECURE_PASSPHRASE>: Strong passphrase for encryption
Passphrase
Configuring the passphrase in the store enables automated backups without prompts.
Initialize Kloset Store
#$ plakar at "@exoscale-sos-backups" createConfigure SSH Access to Source Servers
#Install SFTP integration
#$ plakar pkg add sftpGenerate SSH keys for backups
#$ ssh-keygen -t ed25519 -f ~/.ssh/id_ed25519_plakar -C "plakar@backup"Press Enter for no passphrase.
Copy keys to source servers
#$ ssh-copy-id -i ~/.ssh/id_ed25519_plakar.pub user@source-server-1
$ ssh-copy-id -i ~/.ssh/id_ed25519_plakar.pub user@source-server-2Test access:
$ ssh -i ~/.ssh/id_ed25519_plakar user@source-server-1 'echo "Success"'Create SSH aliases
#$ cat >> ~/.ssh/config << 'EOF'
Host source-1
HostName source-server-1.example.com
User backupuser
Port 22
IdentityFile ~/.ssh/id_ed25519_plakar
Host source-2
HostName source-server-2.example.com
User backupuser
Port 22
IdentityFile ~/.ssh/id_ed25519_plakar
EOFTest:
$ ssh source-1 'echo "Alias works"'Configure Backup Sources
#Add source connectors for each server:
$ plakar source add web-server-1 sftp://source-1:/var/www
$ plakar source add web-server-2 sftp://source-2:/var/www
Verify:
$ plakar source showTest Backup
#Run a manual backup to verify configuration:
# Single source
$ plakar at "@exoscale-sos-backups" backup "@web-server-1"

# Multiple sources
$ plakar at "@exoscale-sos-backups" backup "@web-server-1" "@web-server-2"
List snapshots:
$ plakar at "@exoscale-sos-backups" lsSchedule Automatic Backups
#For scheduler configuration and systemd service setup, follow the same steps as the OVHcloud backup server guide, replacing:
@ovhcloud-s3-backupswith@exoscale-sos-backupsubuntuwith your actual username if different
The scheduler configuration, systemd services, and web UI setup are identical on any Linux machine.
Troubleshooting
#Authentication errors
- Verify SSH keys and user permissions on source servers
Can’t connect to Object Storage
- Check S3 credentials and endpoint URL
- Verify passphrase:
plakar store show exoscale-sos-backups - Confirm bucket name and zone endpoint match
Permission denied
- Ensure SSH user has read access to backup directories
Services won’t start
- Check status:
systemctl status plakar-scheduler - View logs:
journalctl -u plakar-schedulerorjournalctl -u plakar-ui
Alternative UI access
- Install Plakar locally and configure the same store with Exoscale SOS credentials to access backups without compute instance connection