Scaleway Installation
#Plakar Control Plane is distributed for Scaleway as a QCOW2 virtual machine image. The official QCOW2 image for Scaleway can be downloaded from:
Uploading the QCOW2 image to Scaleway Object Storage
#Unlike marketplace-based deployments such as AWS AMIs, Scaleway instances cannot boot directly from an uploaded QCOW2 image. The image must first be imported into Scaleway Block Storage as a snapshot, which can then be attached as the boot volume for the instance.
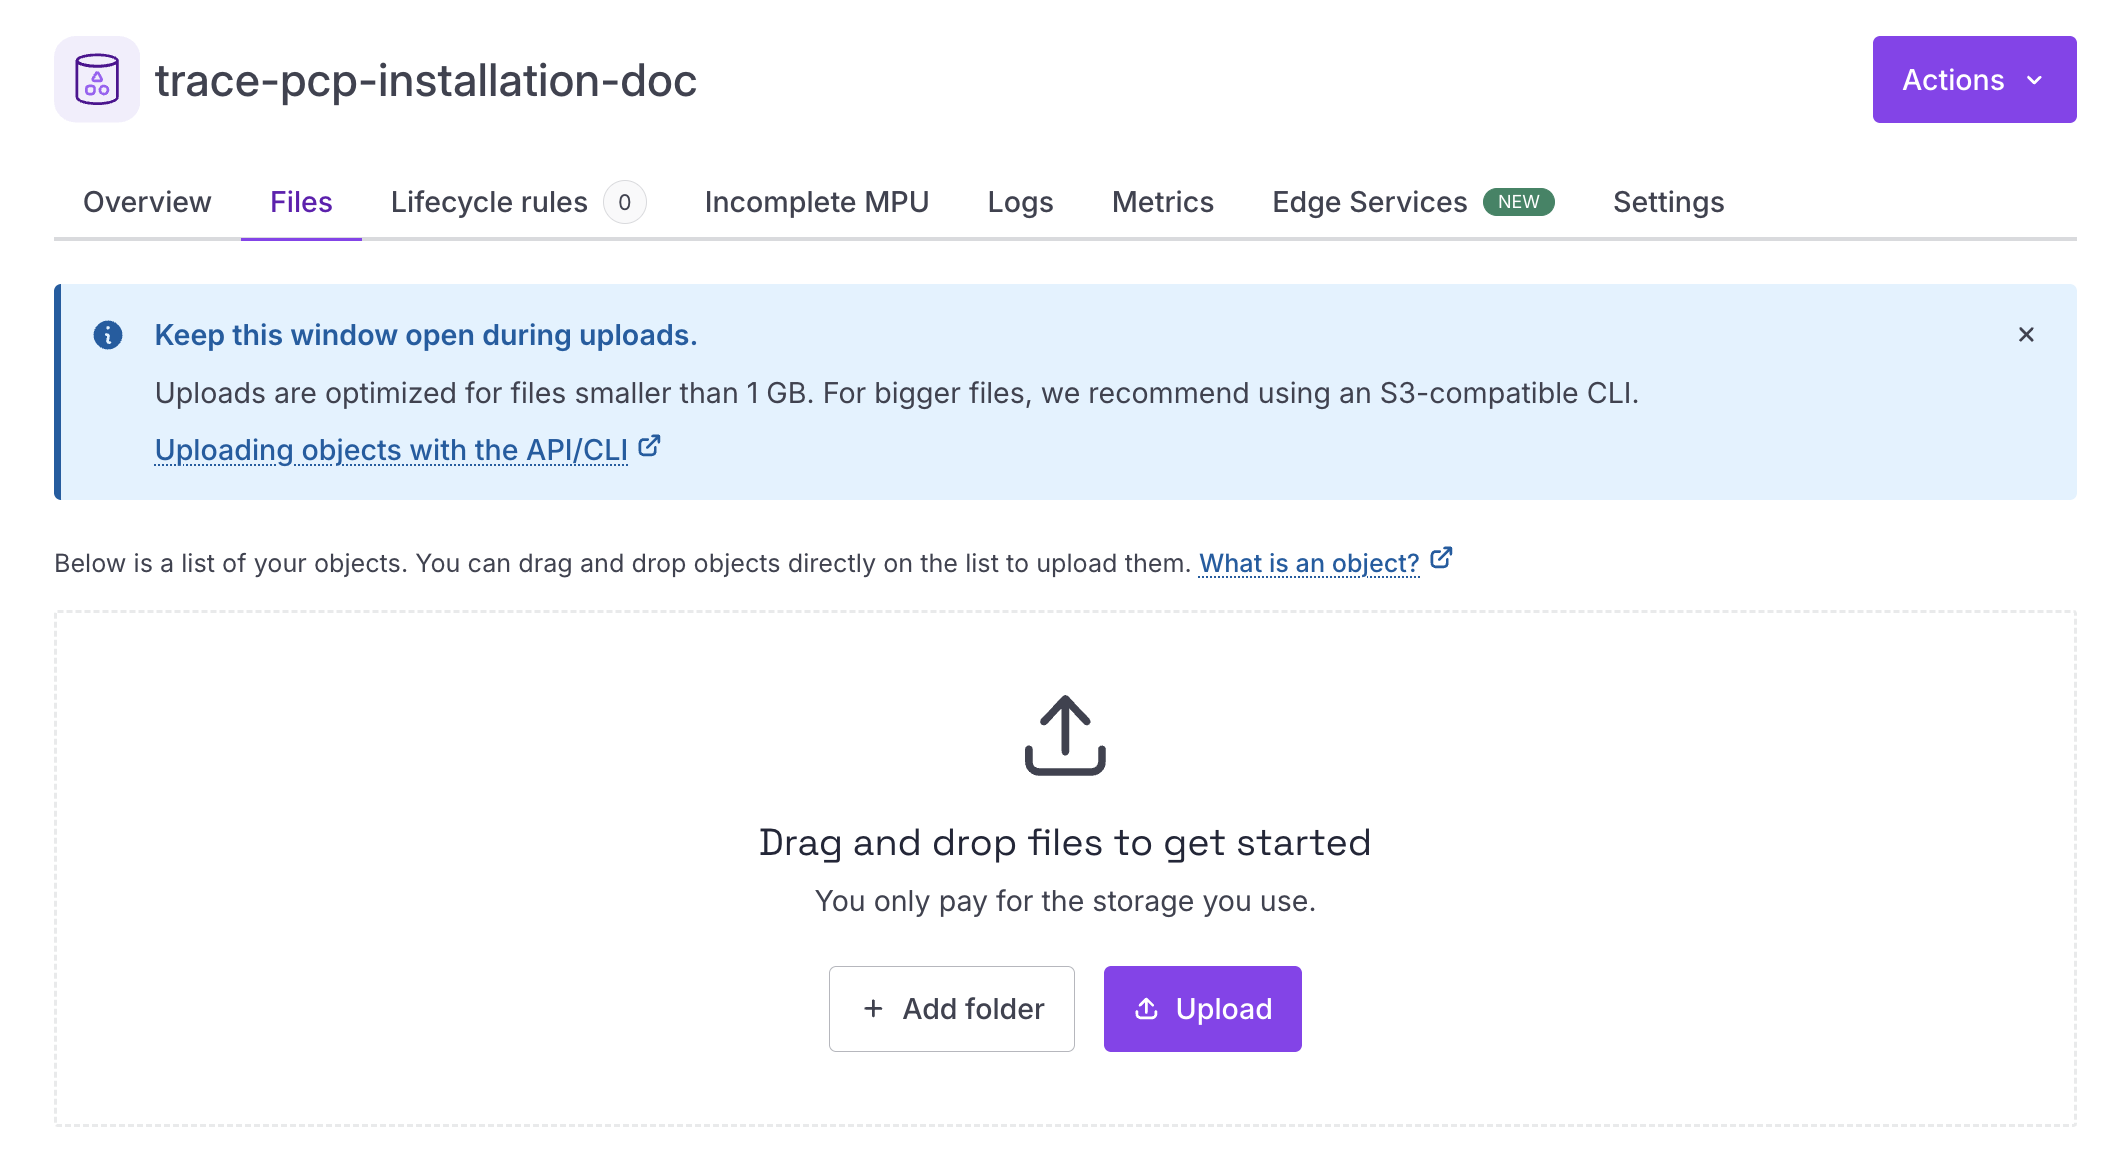
Before importing the image as a snapshot, the QCOW2 file must first be uploaded to Scaleway Object Storage. Create an Object Storage bucket, then upload the QCOW2 image to the bucket.
Creating a Block Storage snapshot
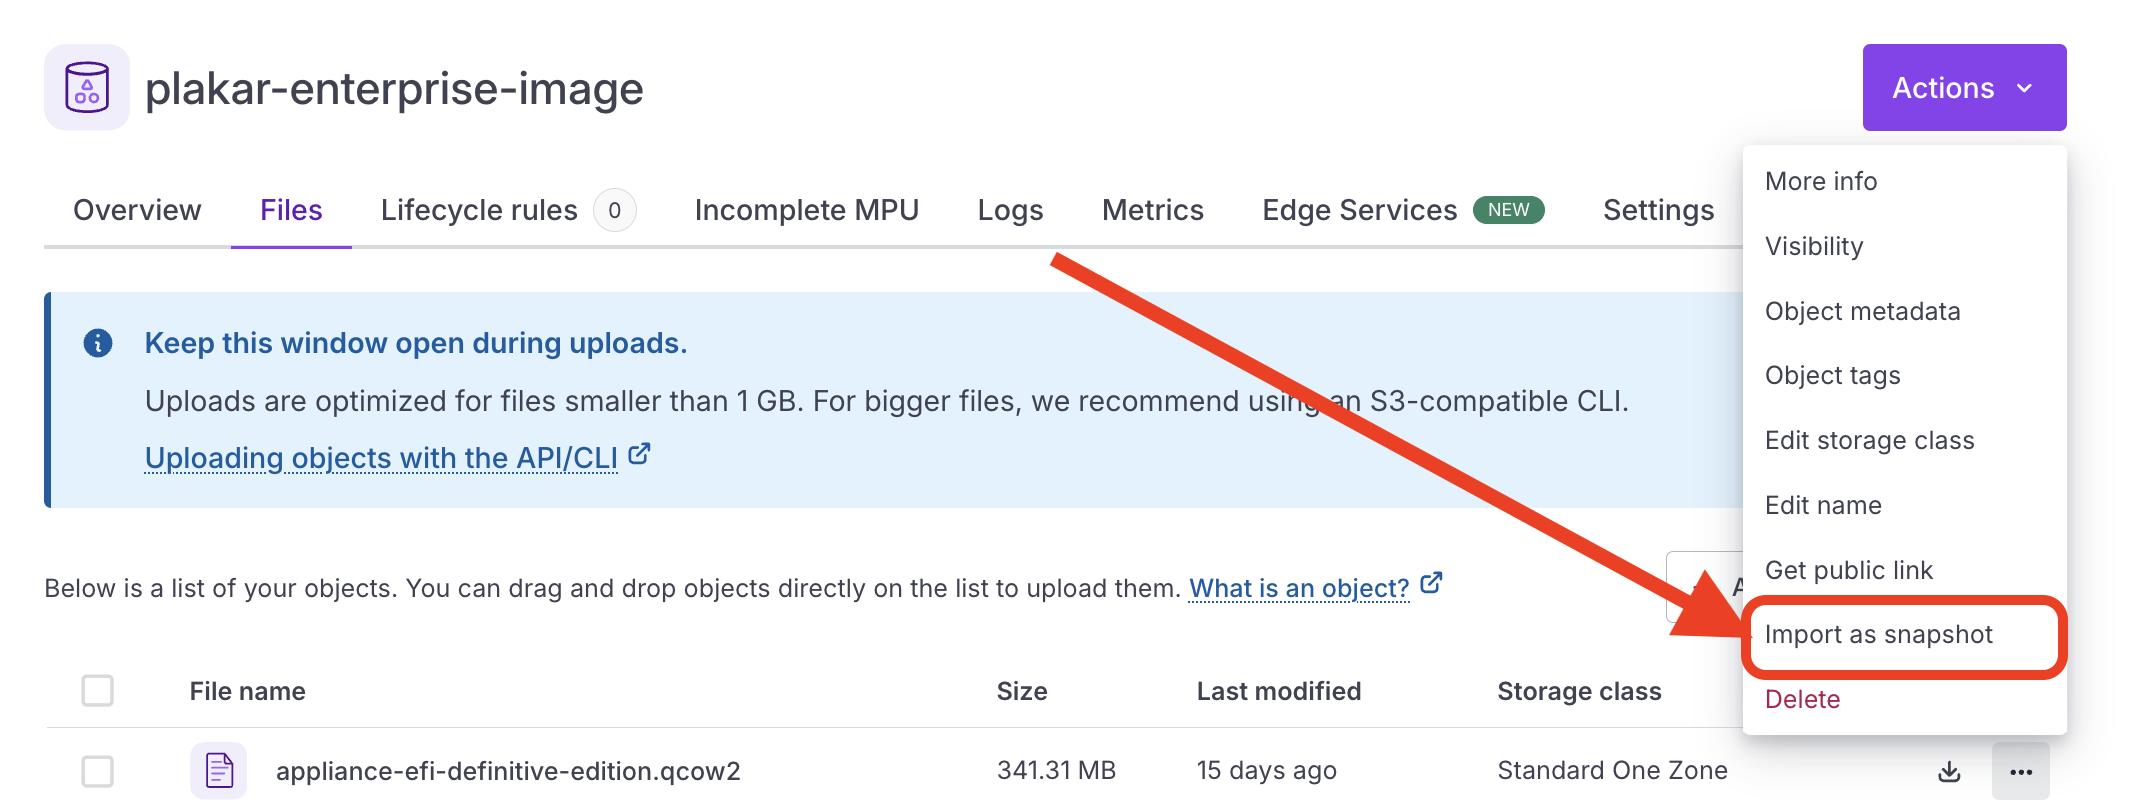
#Once the QCOW2 image has been uploaded, open the bucket Files page and select Import as snapshot from the object actions menu.
Scaleway will convert the QCOW2 image into a Block Storage snapshot that can later be attached as the root volume for the instance.
When importing the snapshot:
- Select the Scaleway zone where the snapshot should be created
- Select Block Storage as the snapshot type

Note
Scaleway instances can only attach block storage volumes from the same zone.
The Object Storage bucket, Block Storage volumes, snapshots, and compute instance should also belong to the same Scaleway project.
Creating the Scaleway instance
#Create a new Scaleway compute instance using the Block Storage snapshot as the boot source.
The instance must be created in the same Scaleway zone as the snapshot, otherwise the snapshot will not be available for attachment as the root volume.
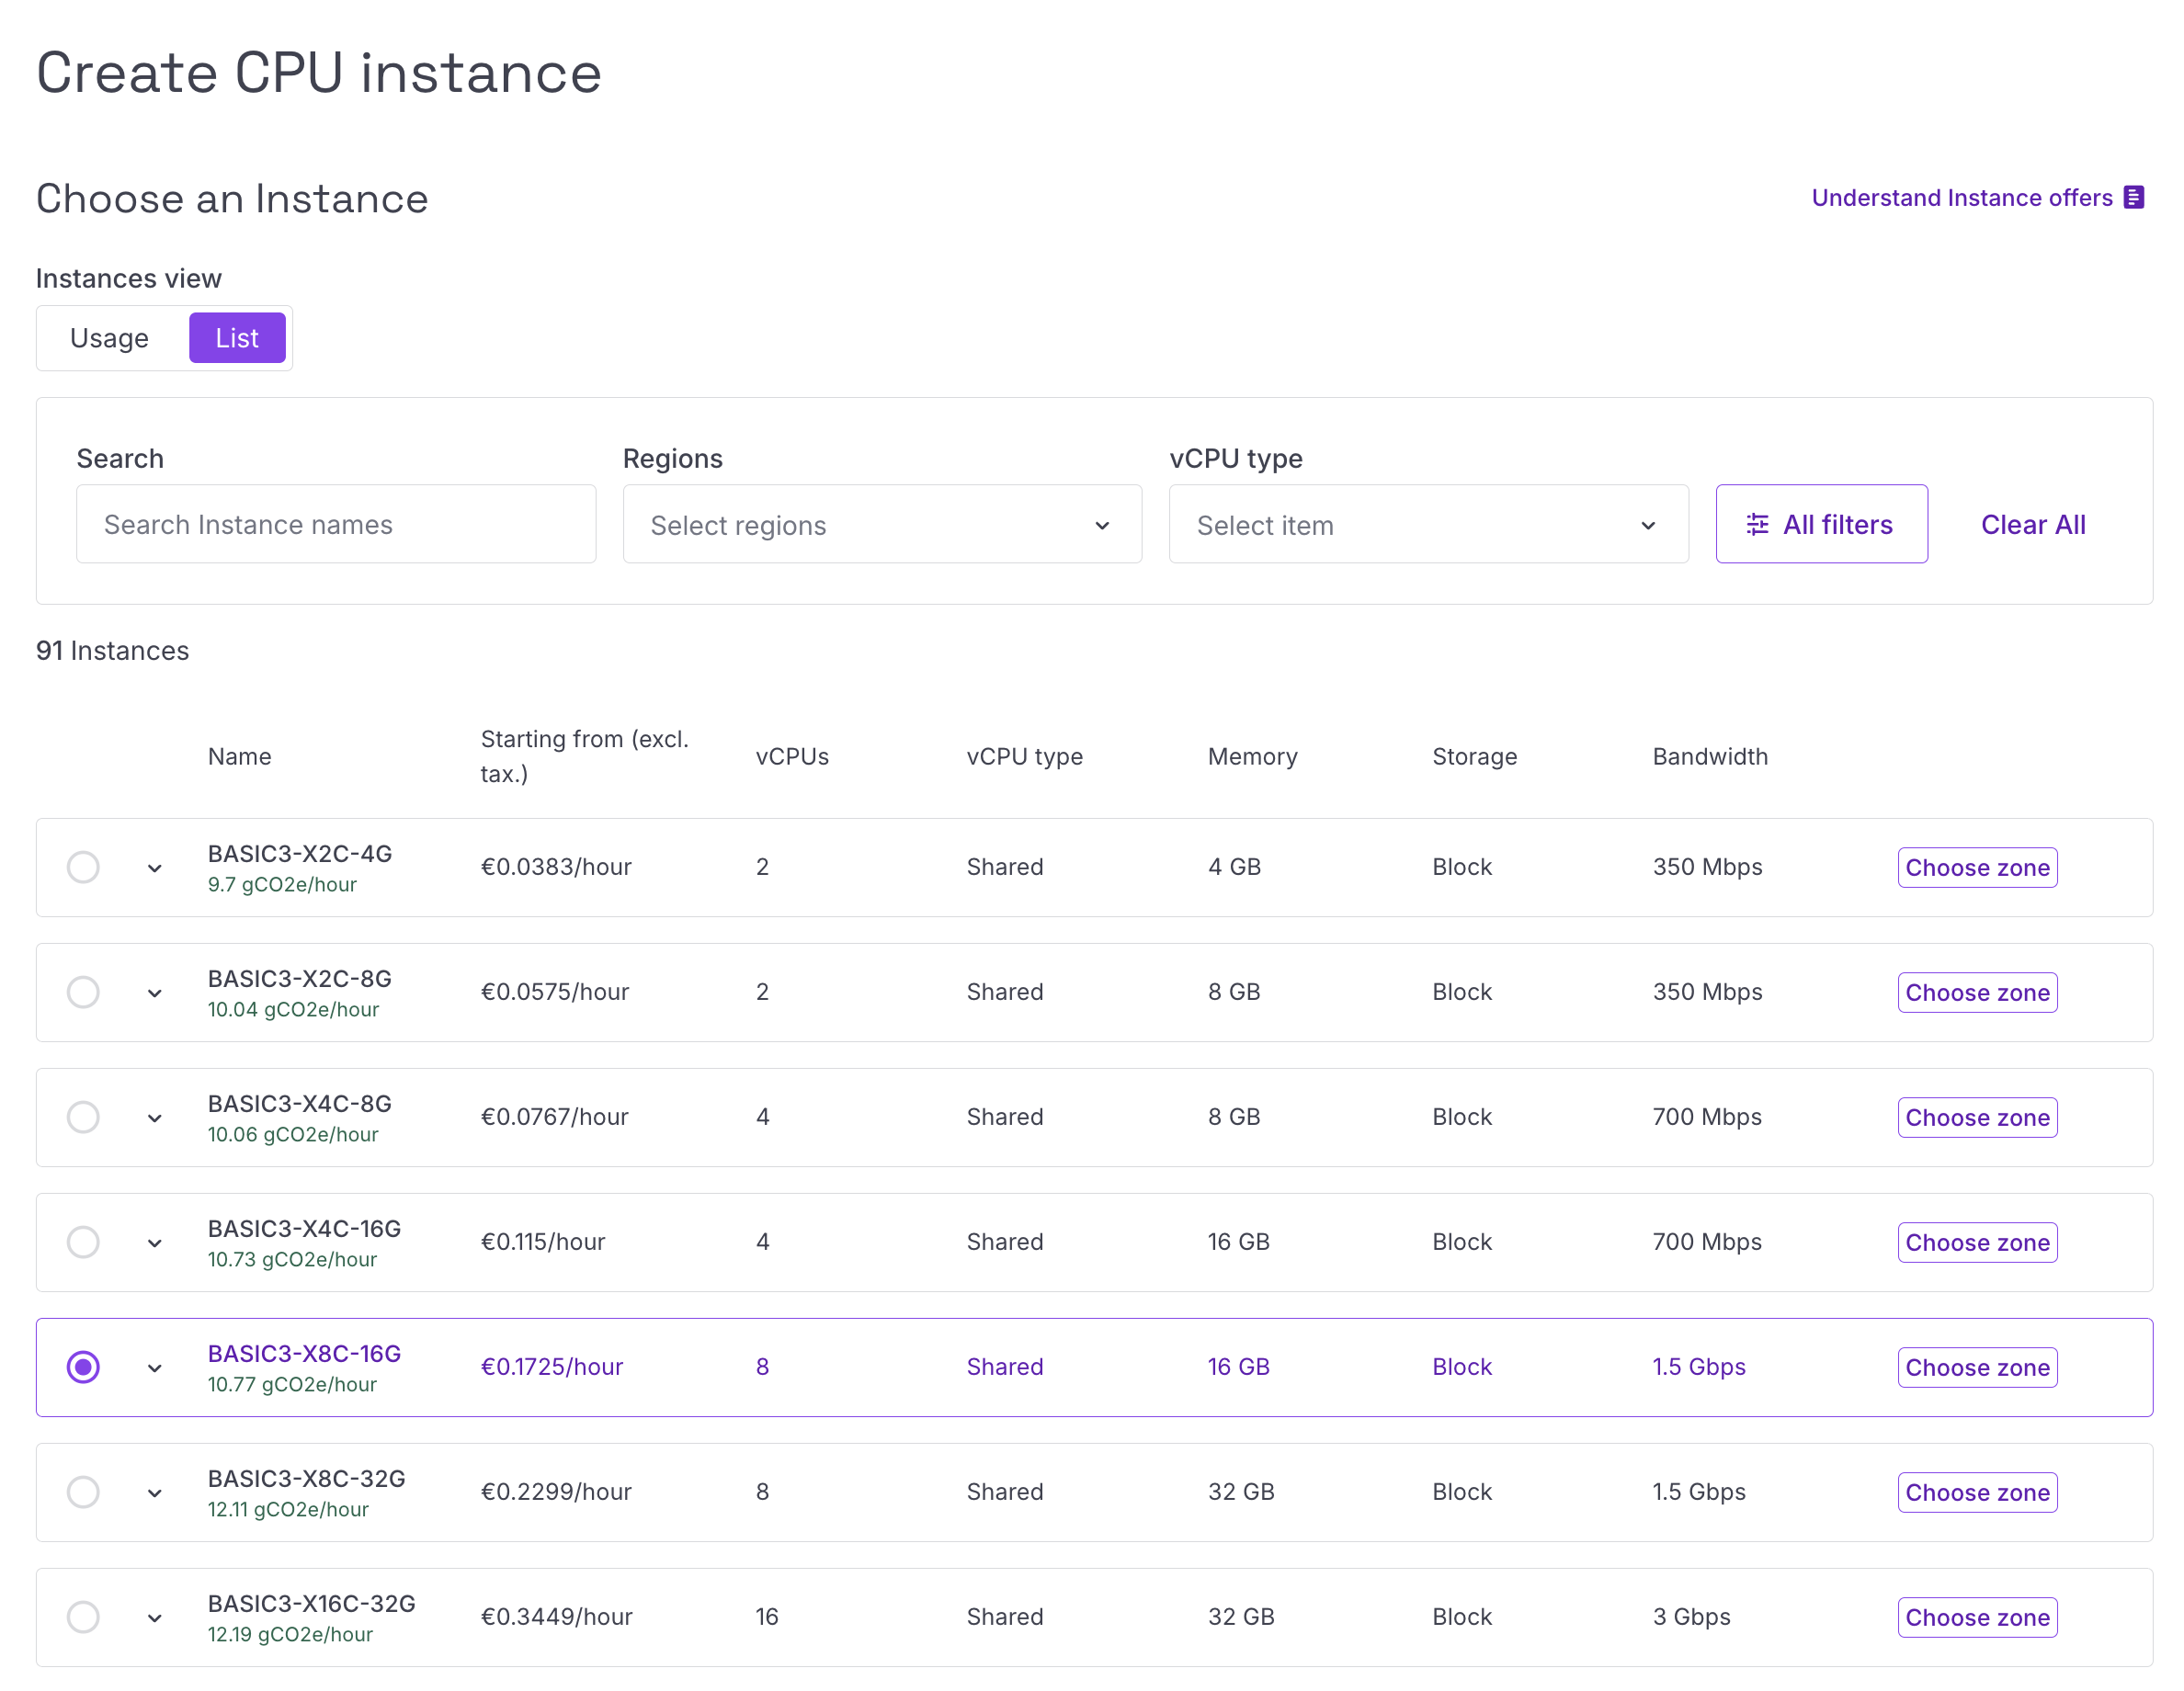
Plakar Control Plane is recommended to run on a machine with:
- 8 vCPUs
- 16 GB RAM
A configuration such as BASIC3-X8C-16G is suitable for most deployments.
Select the Scaleway zone where the instance should be created, then continue to the instance configuration step.
For the instance boot image:
- Open the My snapshots section
- Select the Block Storage snapshot created from the QCOW2 image
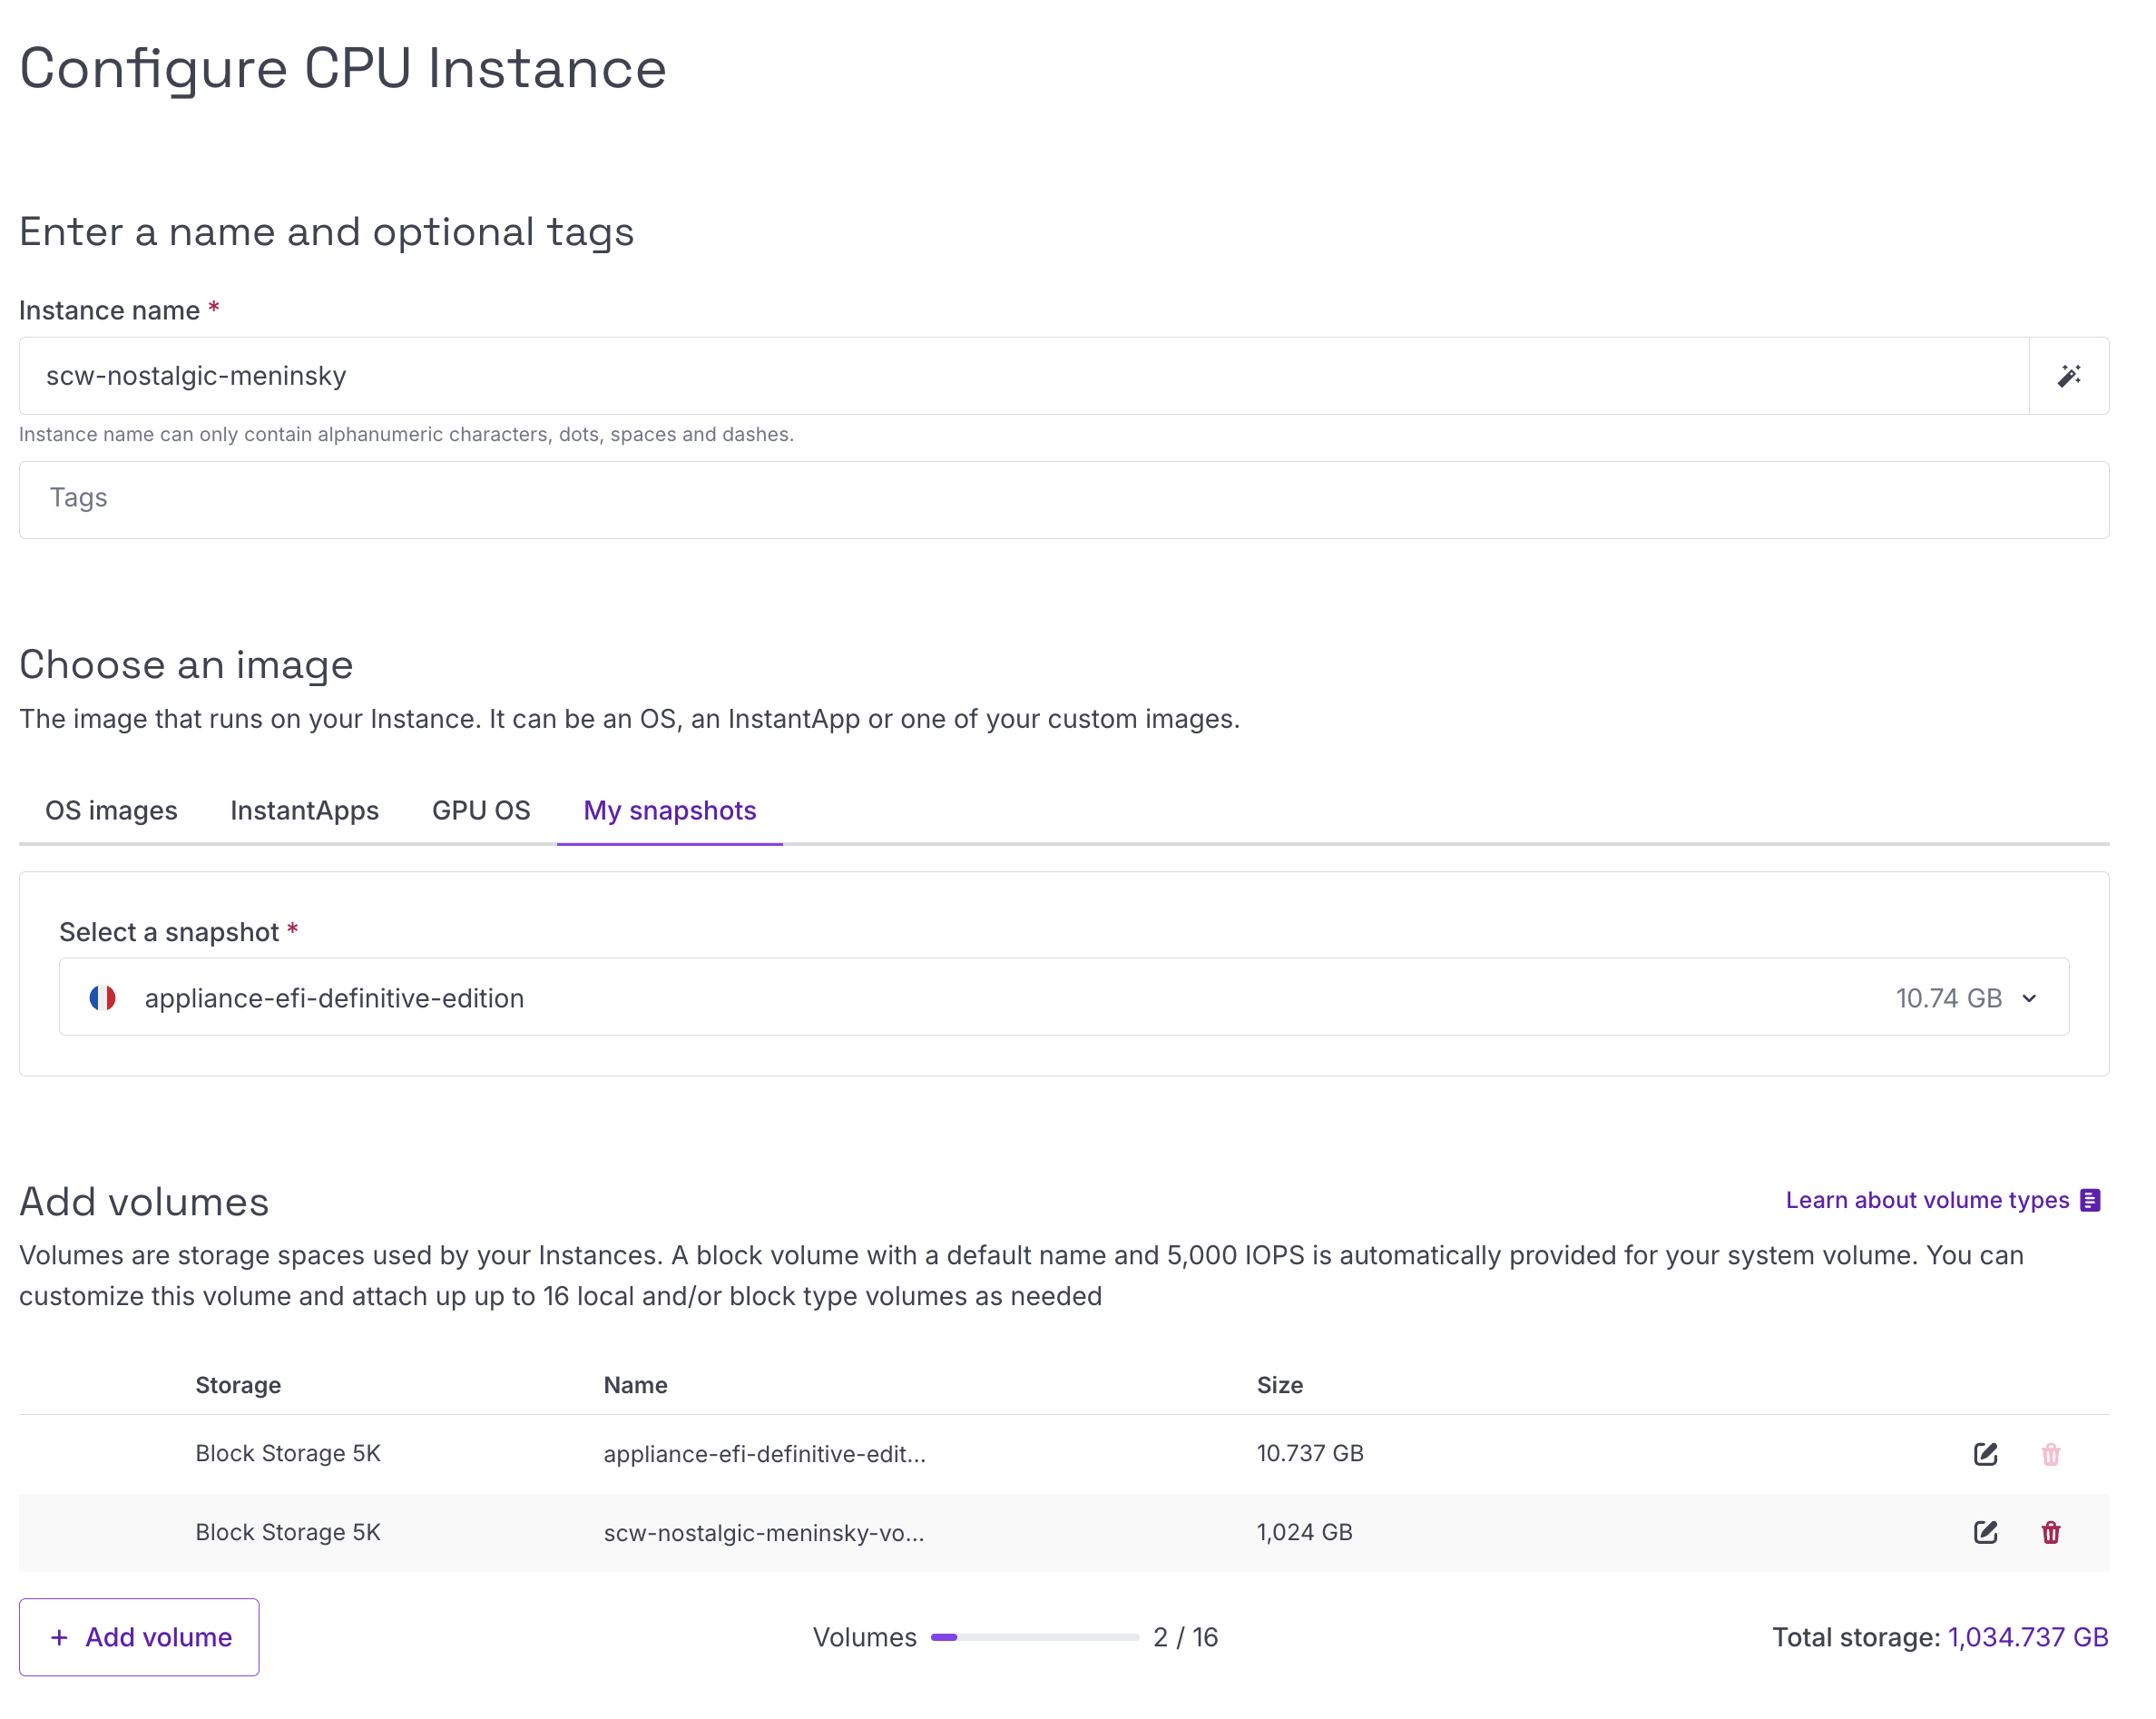
The Block Storage Snapshot volume is used only as the operating system boot disk. Plakar Control Plane requires an additional persistent data volume for internal application data.
Attach an additional Block Storage volume with a recommended size of 1024 GB.
Networking and Security Groups
#The networking configuration below is intended for a basic deployment setup.
In production environments, networking and access control should be adapted to match your infrastructure and security requirements. For example:
- Exposing Plakar Control Plane through a load balancer with HTTPS/TLS certificates
- Restricting access through a VPN or private network
- Limiting inbound traffic to trusted IP ranges
- Using internal-only networking
You’ll need to assign both an IPv4 and IPv6 address to the instance.
When the instance is created, Scaleway automatically attaches the default security group. Once the instance is running, open the instances page and go to the Security Group tab.
Under the inbound rules configuration, set the default inbound policy to drop
all, then add a rule allowing inbound TCP traffic on port 80.
The allowed source can be:
- Your public IP address
- Your organization gateway or VPN address
0.0.0.0/0for temporary testing access
Warning
Using 0.0.0.0/0 allows access from any IP address and should only be used
for testing or temporary deployments.
Accessing Plakar Control Plane
#After the instance has started and the security group has been configured, Plakar Control Plane can be accessed from your browser using:
http://<public-ipv4-address>Where <public-ipv4-address> is the public IPv4 address assigned to the
instance. For first-time installations, you will be guided through the
enrollment process to:
- Register the instance with Plakar services for licensing and billing
- Create the initial administrator account
See the enrollment documentation for more details.